Collaborative Client Project
Introduction
The Collaborative Client was one of our first projects to undertake during the first semester of our second year. The real aim of this project was to get a sense of the reality of working for a client, including all the steps that must be taken when developing your work. We were introduced with a brief overlook at the upcoming weeks as well as the list of different client ventures available to us accompanied by a presentation on each. There were many offers from local clients and university lecturers. Each project had its benefits depending on what we were studying and what kind of work we wanted to develop. As a game design student, it felt fitting that I chose the project one of our lecturers was offering, which includes the development of a puzzle-game named Tomebound.
The Brief and Initial Ideation
The boss has been defeated and the credits have rolled. At the end of an arduous campaign to acquire the greatest magical tome ever made, two brave wizards claim an enchanted book at the top of the tallest tower, only to find that are now cursed.
One adventurer can only move forwards and back while the other is limited to left and right. This is going to be a long walk back to the inn.
Tomebound is a fantasy themed action/adventure puzzle game that mixes elements of dungeon crawlers and Sokoban style puzzles into an interactive, adaptable setting to allow for intriguing puzzles that can be solved in many ways. The game features two playable main characters and a magical tome. Both characters are controlled by one player, and they can be attached to the tome, which is when the movement is restricted. The player can switch to one character to move left and right and the other to move up and down. The player the detach one character from the book which allows for free movement for that one character but zero movement for the other still attached to the book. The two characters have unique abilities, one being a portal that can be placed on floors and ceilings, the other being steampunk drones that can move objects around the level. The goal is to get both characters and the book to the exit door at the end of a three-floor level.
After an introduction to the game and explanation of the brief, the many different tasks that were required for the game were listed. This included the creation of assets, the main characters as well as enemy characters, coding for mechanics and other aspects like branding. As my focus is on game design I chose to develop my own enemy character.
Creating the Idea for the Mimic
The first hurdle was to create and pitch an idea for an enemy character including its design, how it functions and how it fits into the game. The first stages being developed for the game featured a lava setting, so it was important that the enemy characters being created could fit into that lava theme but were also reasonable enough that they could potentially be fitted into different themes for later levels in the game, for example a rock theme.
The first profile I created was for a Fire Mage. This character would stay on one tile while launching projectiles in a specific direction or ones that had the ability to track the player. This enemy would be beaten either by avoiding the projectiles, baiting them to break/activate objects or blocking the trajectory path of the projectiles.
We were encouraging to use AI generation tools to gather concept art for the designs of our characters/assets and to select the best bits and create our own overall design. Below is a preview at some AI generated concept art for the Fire Mage, gathered using the Bing Image Creator (Bing Image Creator, 2023).
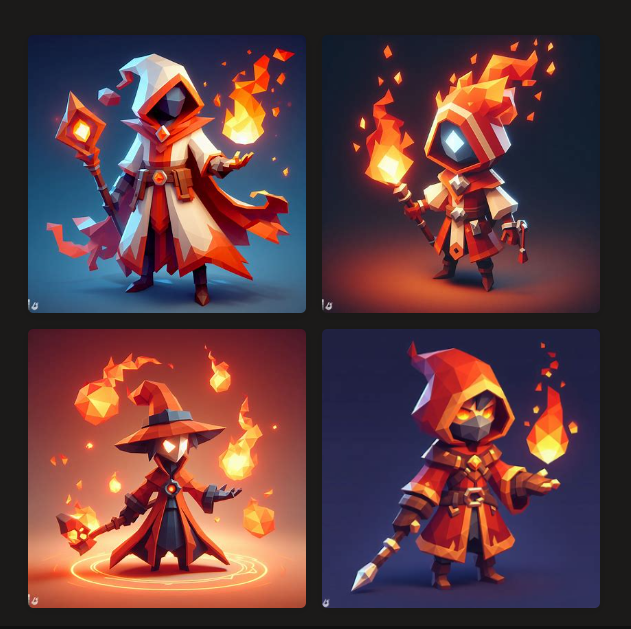
Prompt Used: low-poly stylised video game fire mage character concept art.
The Fire Mage profile was pitched to the client and feedback was gathered. In short, the idea didn't fit the brief for the standard for enemy characters. The main idea was that the hazards of the tower acted as mindless minions/grunts and that the mage was too humanoid of a character and this was a design feature designated to the main characters only. A whole new idea was needed, so with some recommendations from the client the idea for the Mimic enemy was born.
The Mimic would work like any other mimic you would normally encounter in any other game, it would go through a process to take the form of the playable character and copy the movement inputs. The main way to overcome this threat is to lure the Mimic into a floor/wall trap or use the mechanic of copied movement to your advantage to move objects around in the environment or activate things like buttons or levers.
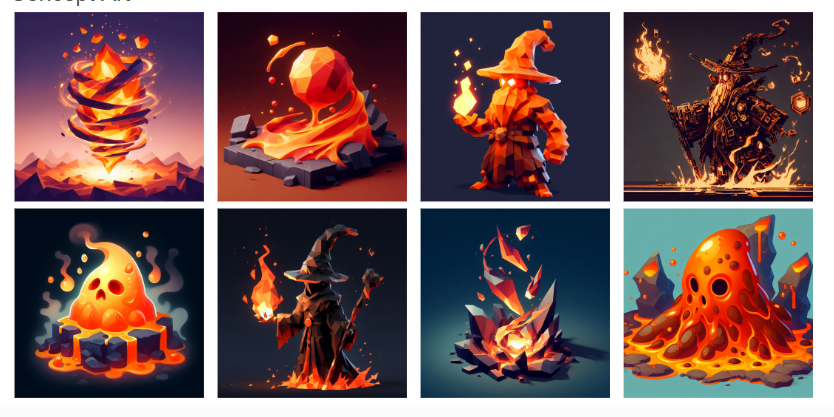
Prompts Used: low-poly stylised video game fire slime concept art.
low-poly stylised video game lava blob concept art.
low-poly stylised video game spinning lava rocks concept art.
low-poly stylised video game rising lava concept art.
low-poly stylised video game fire mage character concept art.
As shown above, a large amount of concept art was gathered, and it needed to be narrowed down to the concepts with features that I think would be a perfect fit for the enemy. The concept art generated featured three different states of the Mimic enemy, the idle form, transformation form and the mimic form. The idle form would occur when the Mimic is being viewed outside of its activation range or from a different floor. Once the player gets closer, this is when the Mimic goes through the transformation phase, an animation that takes the idle form and changes its shape and character into the Mimic form. Finaly, the Mimic form is when the enemy starts to copy player movements and its appearance is like the playable characters. Shown below is an overview of the final concept that I landed on.
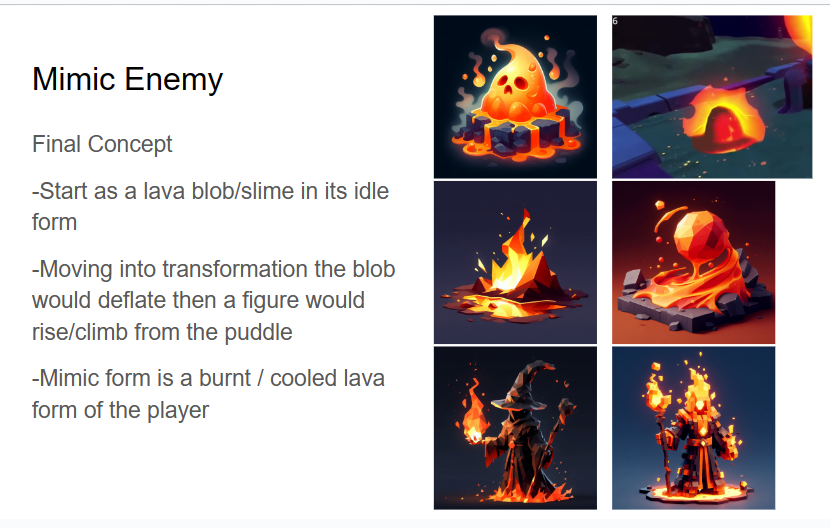
The concept starts with the idle form which looks like a fire/lava blob. I used the fire slime from Slime Rancher (Slime Rancher, 2017) here as it was a good reference for the design I wanted. The two middle images show the transformation stage, starting with the blob deflating into a lava puddle before the mimic figure would rise and/or climb out from the puddle. The final concept art shows the Mimic form, with the appearance of burnt/cooled lava rocks covering the body of the Mimic.
With the final concept being a success and accepted by the client it was time to move onto the first stages of developing the meshes in Blender. (Blender.org, 2002)
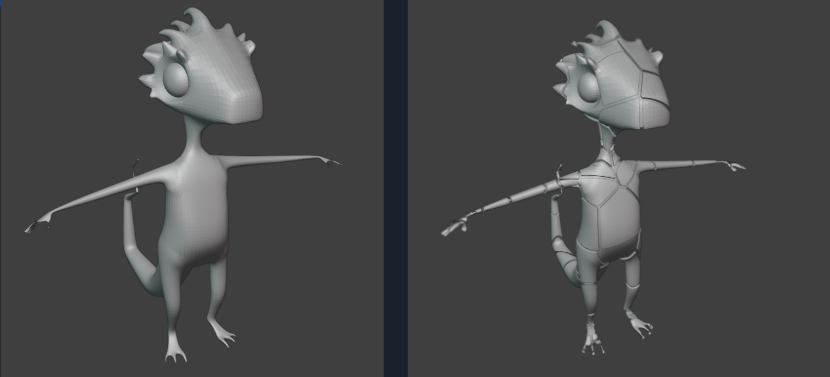
I started to develop the Mimic form by selecting one of the character head templates, provided by our client, to start working with. At this point in time it had been decided that the two main characters would be wizard lizards.
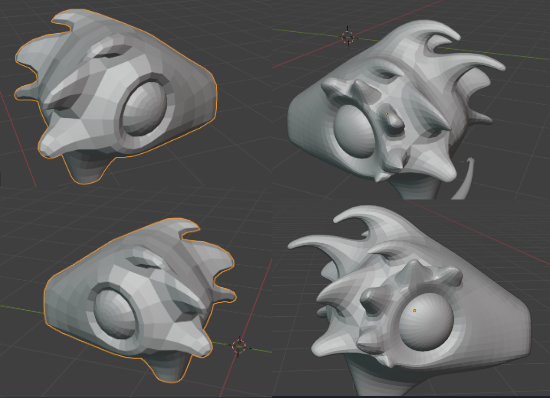
The left-hand heads are the templates that I chose to work with. I used the current state of the main character models, being developed by other students in the team, as a reference and took features from both, giving those features a little twist and attaching them to the Mimic head. I added a subdivision modifier to make the modelling smoother and started to create the extra features. These included the bumps around the eyes, and the two hair-like features located down the top to back middle of the head. These were creates by simply extruding some edges to create the basic shape that was desired and was followed by some final adjustments to the shape of the features to make sure they were just right.
Once the head had been approved, I attached it to the body template and started working on creating some finer detail. The image above shows the process of cell fracture, which was used to get the burnt/cooled lava rock appearance across the body. Cell Fracture is a free Bender add-on that essentially divides the selected mesh into a specified number of fractures. In this case there was roughly 100 fractures with a margin of 0.015, which created the gap between the fractures. After selecting the main mesh and using the shrink tool to shrink it down, it left the perfect pattern for a cooled lava rock look.
However there is a problem that can occur with cell fracture where it struggles to divide the mesh properly in some finer detailed areas, in this case the head. What was left over was many glitched fractures that extruded way to far out from the head or just had the wrong shape. The solution was the create these specific fractures manually. This was an easy but somewhat time-consuming process of selecting the necessary faces and extruding them from the face. These faces were then separated to create a new object where they could be shaped freely without affected the main head. After filling in some holes on the head and shaping each of the manually created fractures, the perfect fractured model was created.
The next step was to move onto the detailed sculpting of the outer body, to make the individual fractures look like rocks emerging from the lava body. This was a time-consuming process as each fracture on the body and head had to be individually sculpted. The method I used however was quite straightforward and the outer body started to come along quite quickly. The method used was as follows:
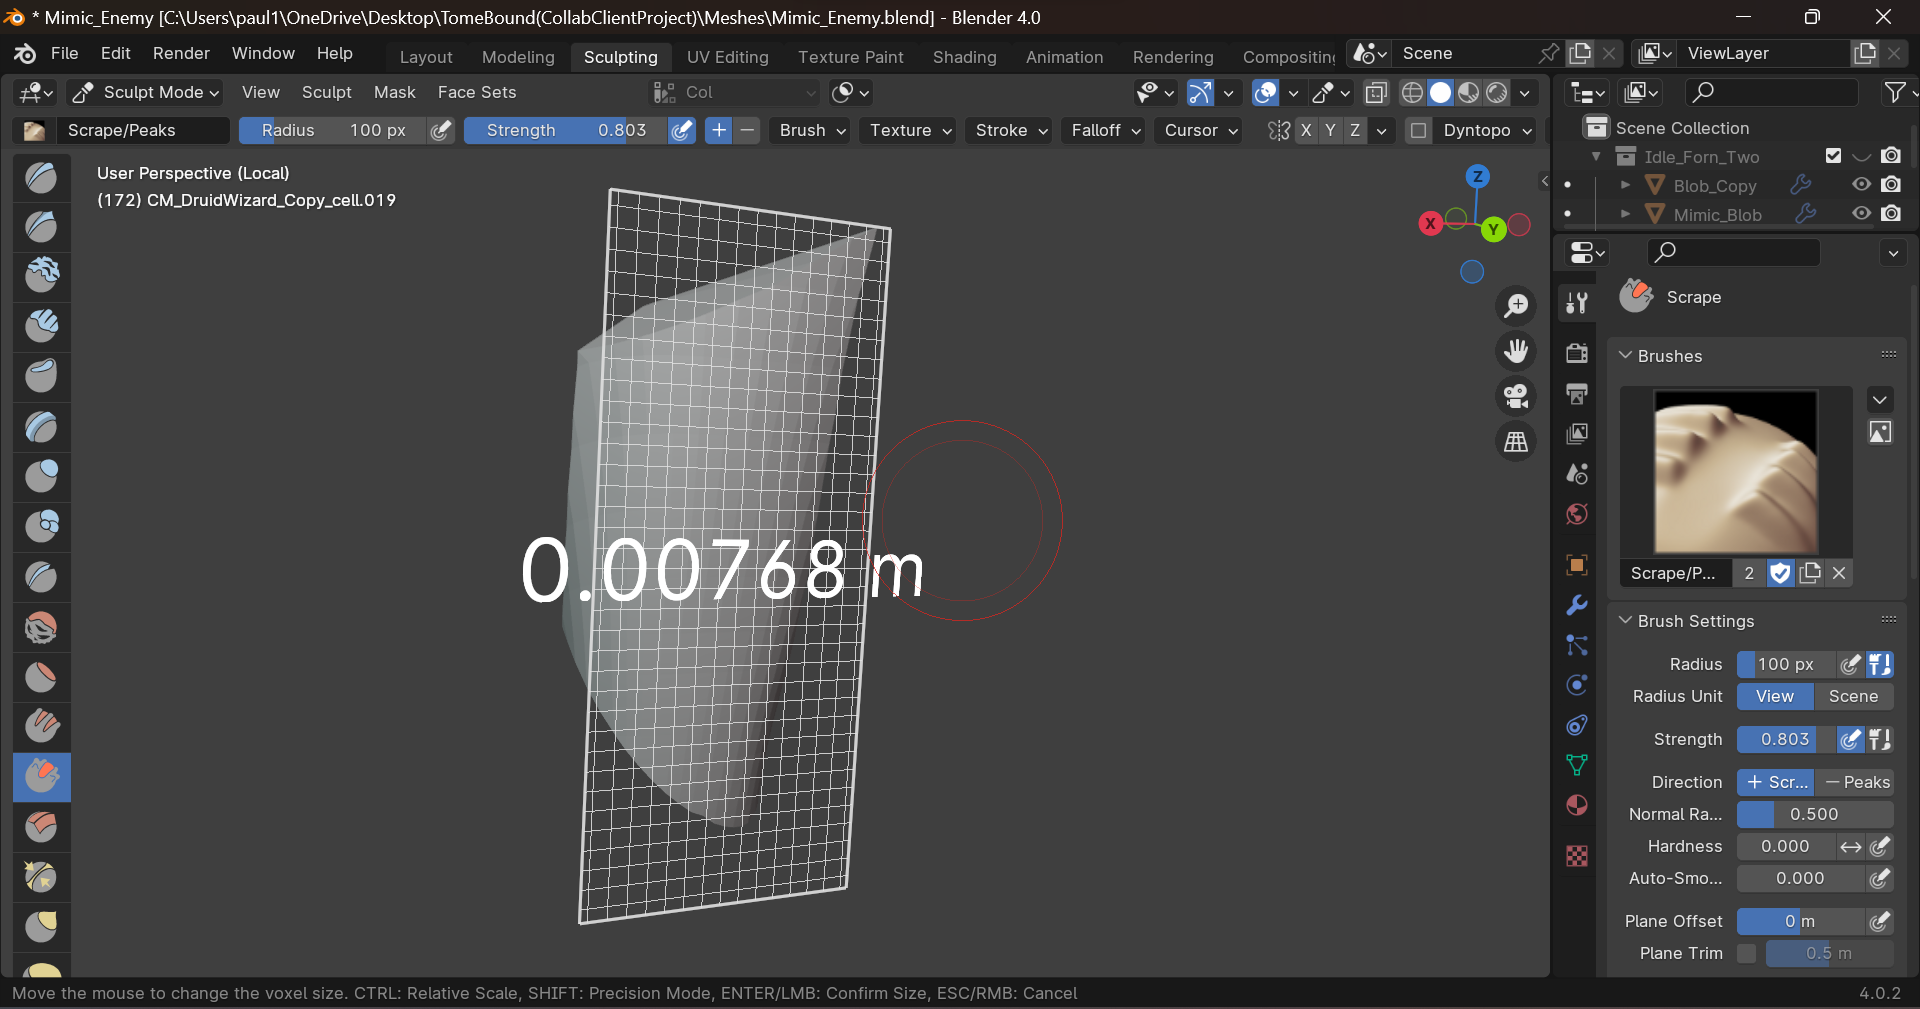

The first stage was to re-mesh the object down to a size where I could create a rockier shape out of the object. The values for re-meshing vary according to the size of the object so the value seen above will not always be the same. Once this was done, I could start using the clay strip tool to add some rocky extrusions to the surface. I only prioritised modelling the sides of the object that would be seen from the outer body as modelling the whole object would create an unnecessarily high poly count. I then used the smooth tool to sharpen some of the edges and soften some others left behind from the clay strips.
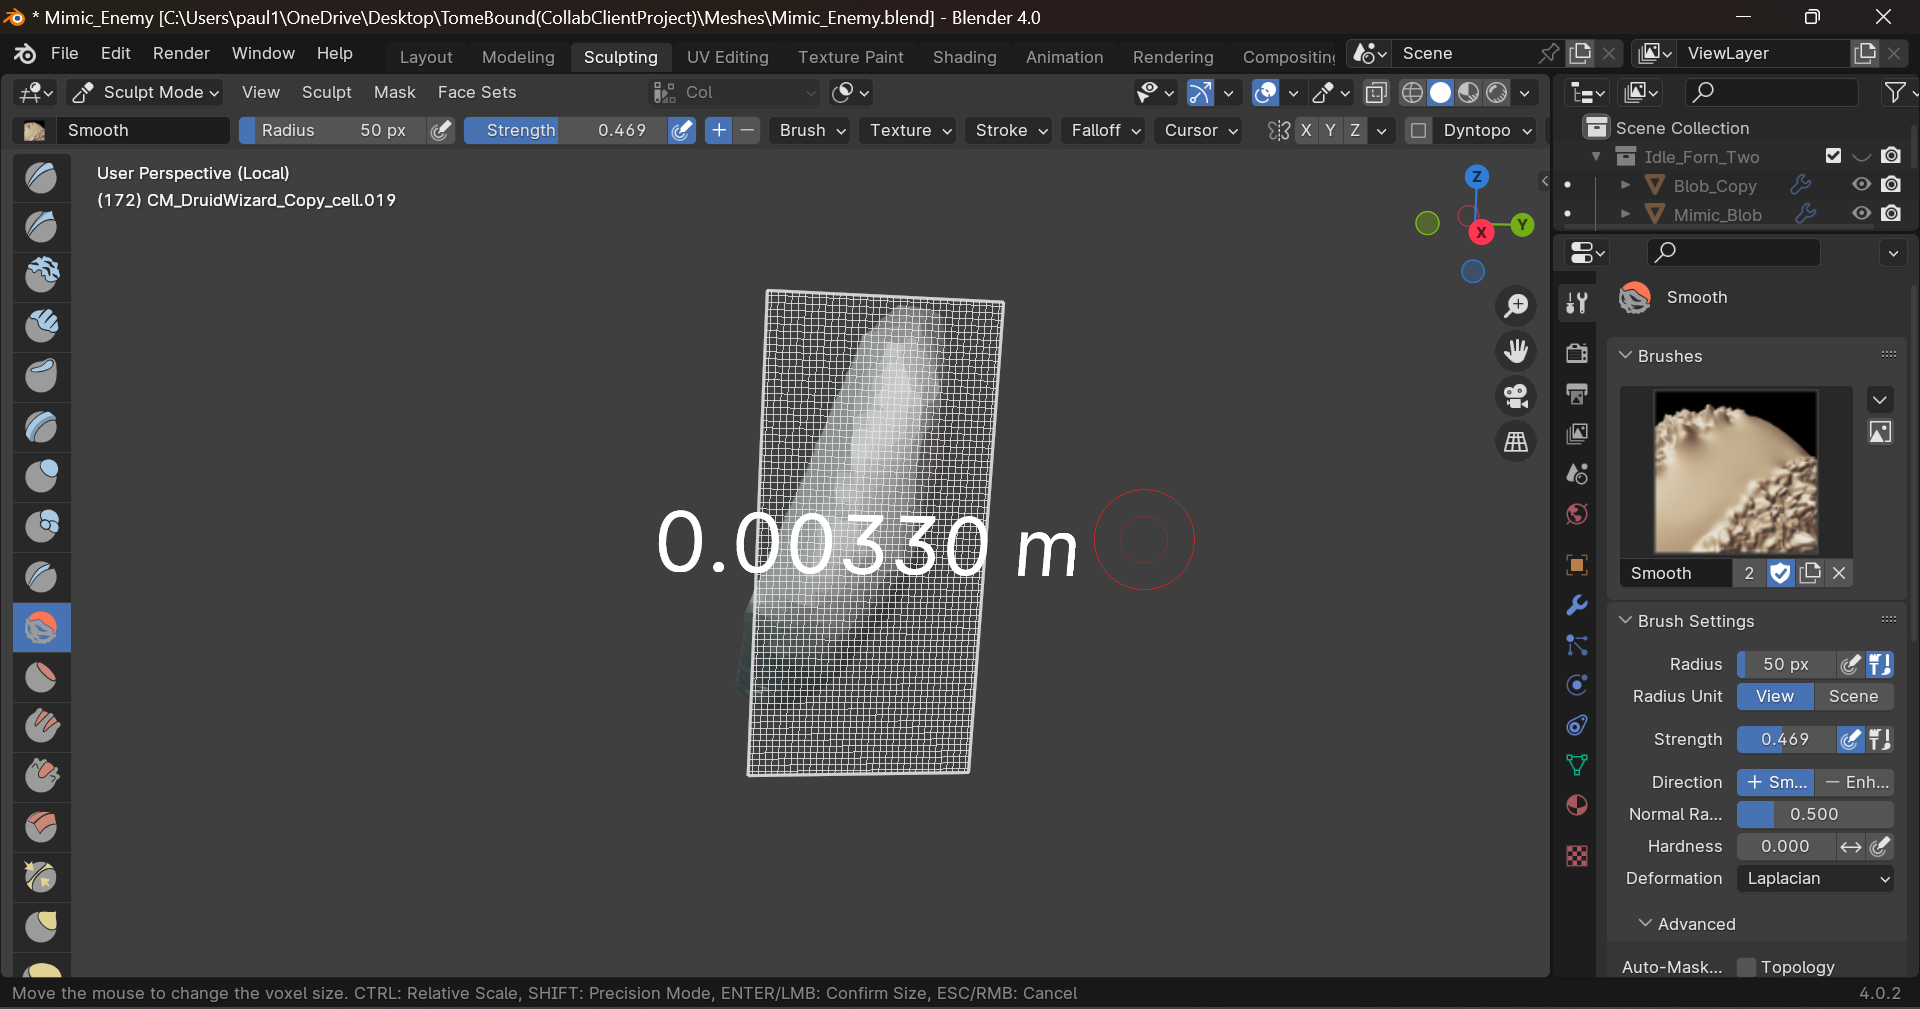
The second stage to the modelling was essentially repeating the first but on a smaller re-mesh value, this way the details and sharp rocky edges from the clay strip and smooth tool would become more definitive. It was very important to use the clay strips to a somewhat extreme level so the objects would take the shape of a rock, otherwise the fractured rocks on the body would appear too flat.
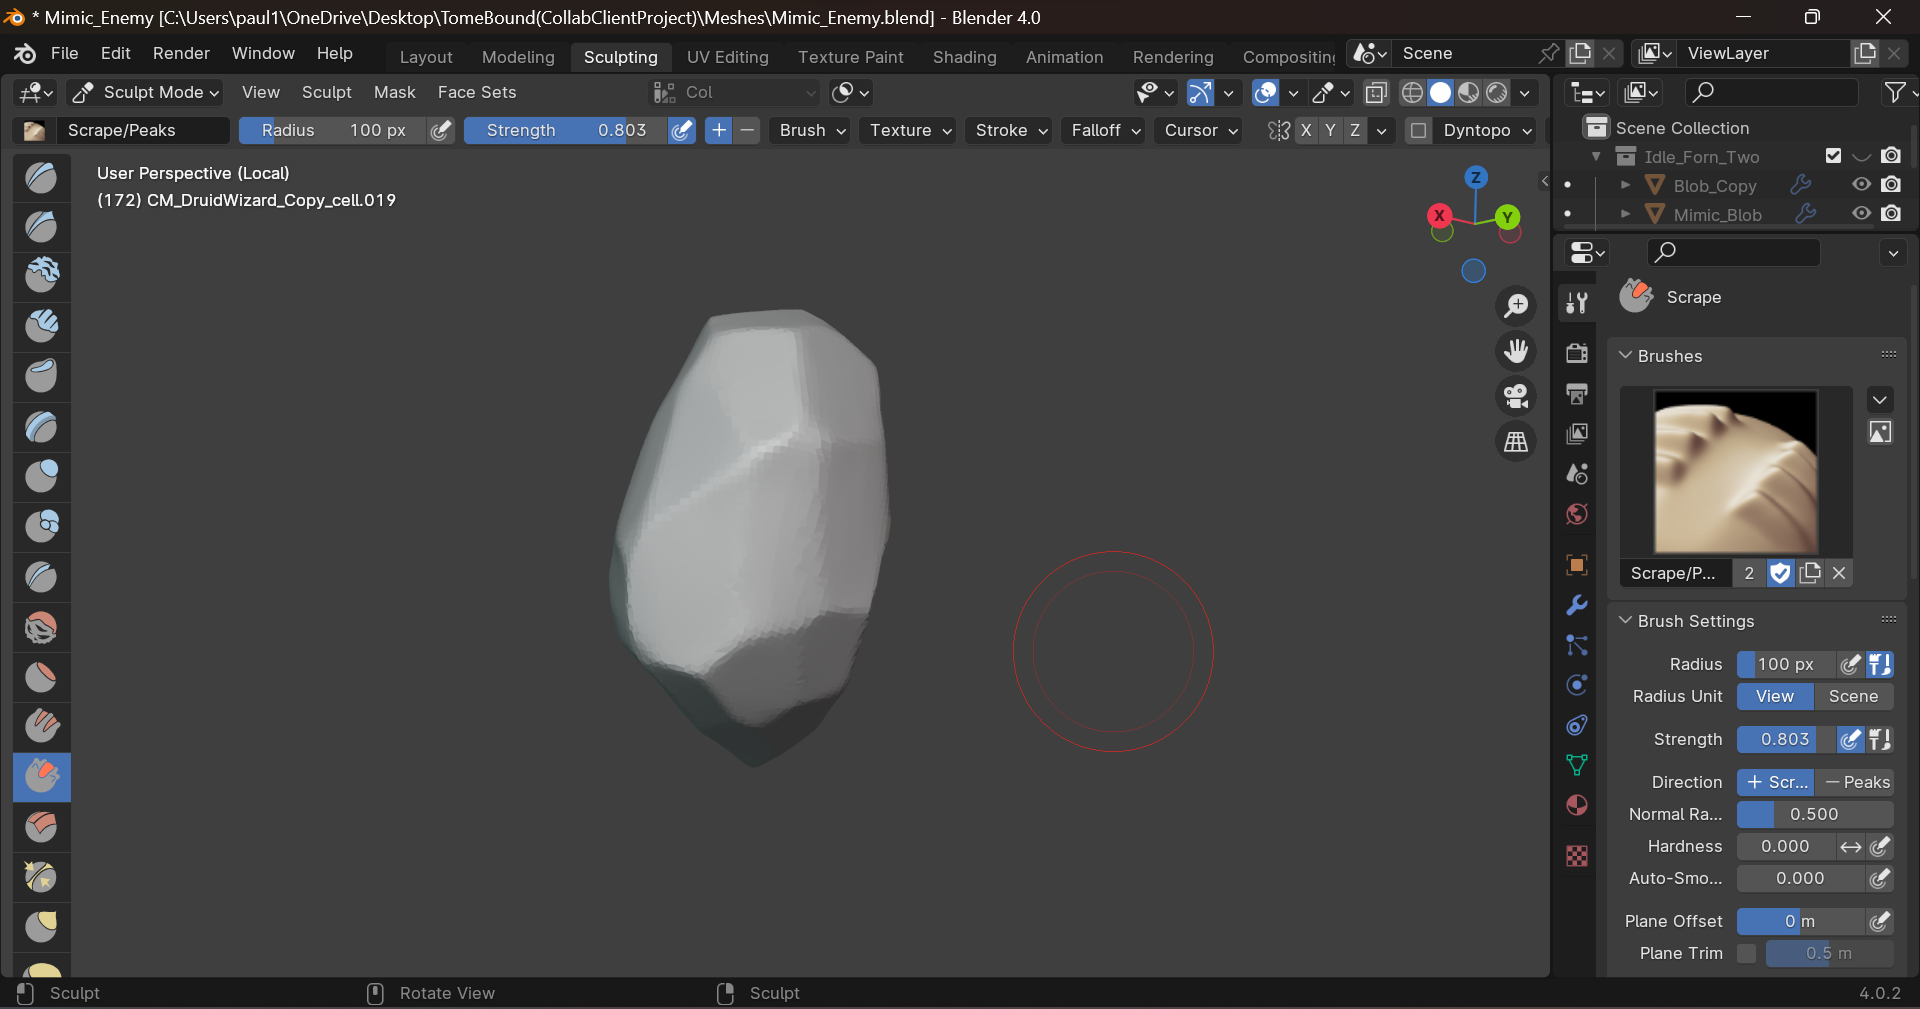
After stage two the rocks were left with the overall shape needed but the texture was too cloudy, so to solve this I used the scrape tool to flatten down the face which also resulted in the edges becoming sharp and defined, which left the perfect rock for the outer body. The process of scraping the sides involved clicking in one area many times to make the face really flatten down and get to the desired shape.
You can also watch the whole sculpting process below.
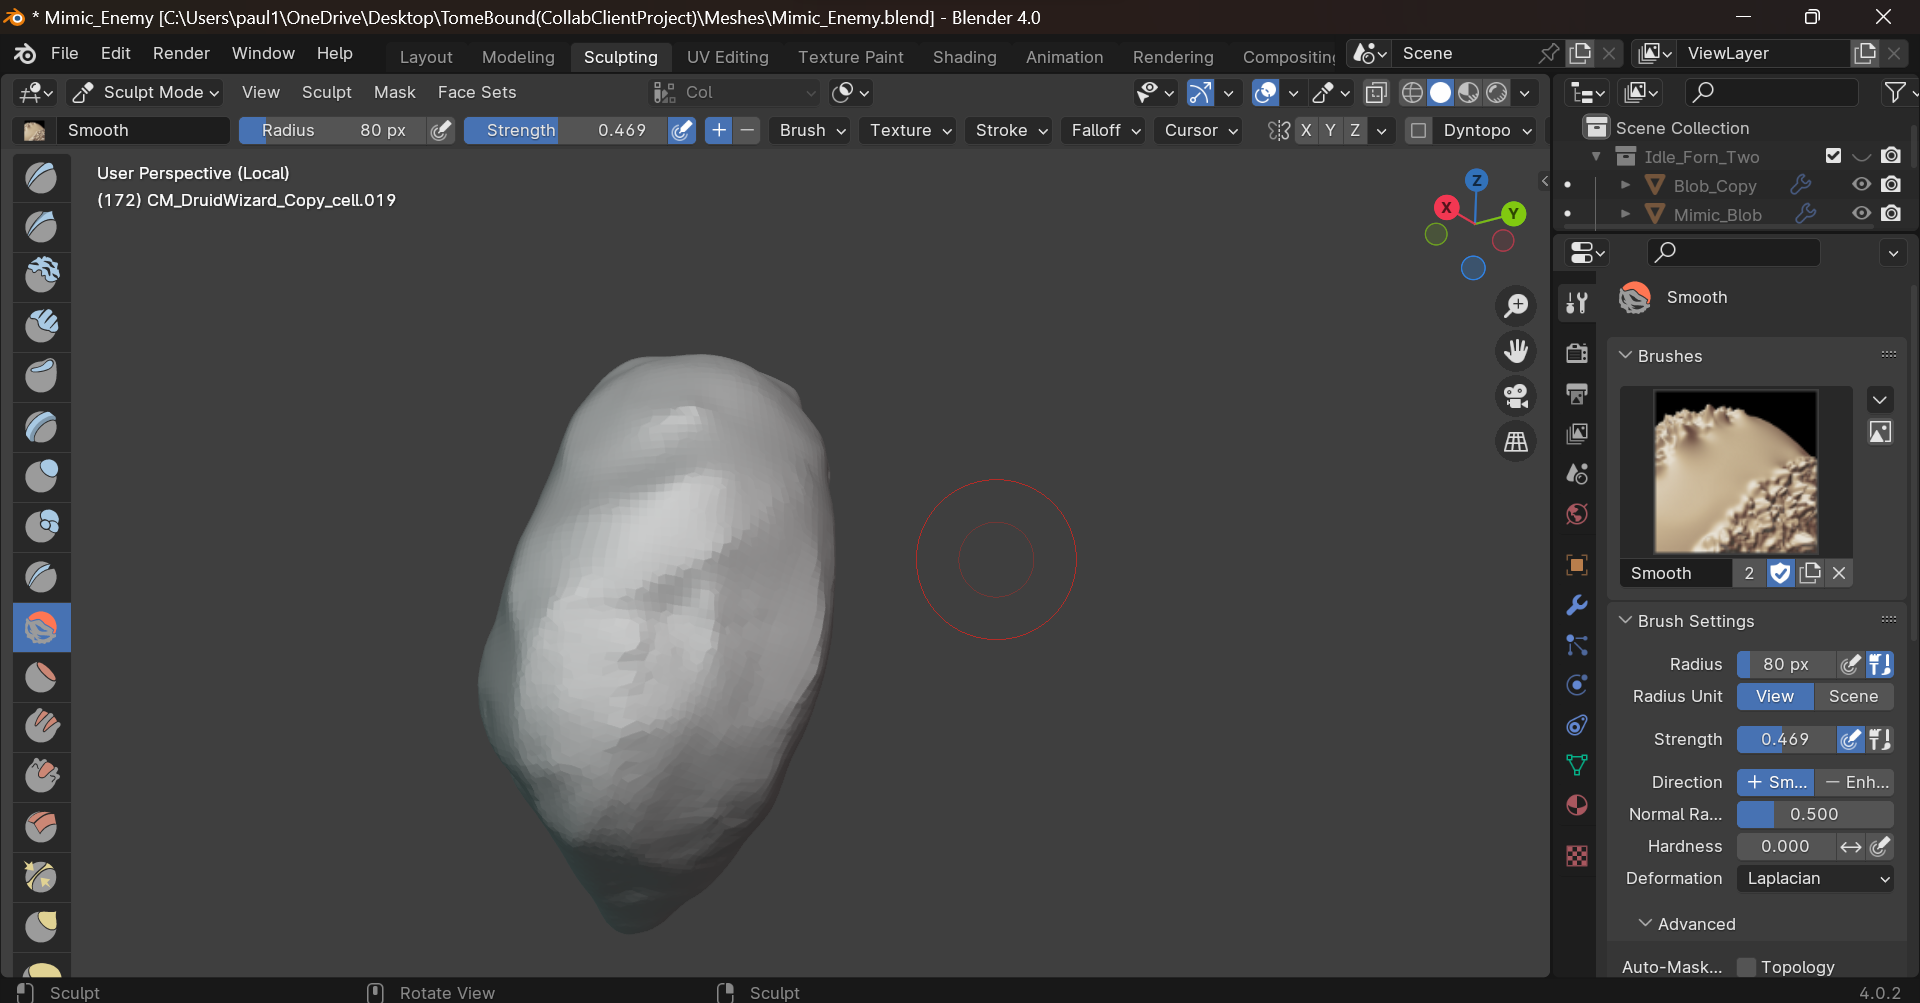
Next, I moved onto creating the Idle form. As mentioned before, this form is what occurs when the player has not activated the transformation animation yet, and the mimic stays idle as a lava blob.
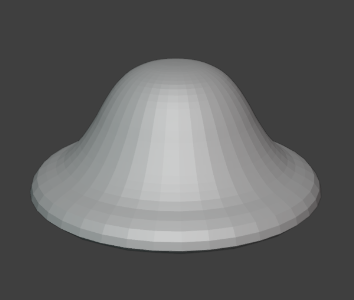
I started by taking a circle mesh with 20 sides and extruding the edges upwards to create the slime/blob seen above. I also added a subdivision modifier here to make the blob seem smoother. The next stage was to model some basic facial features onto the blob, including some shallow eyes and a nasal bone as seen on a skull.
The future of the Mimic
The future of the Idle form will see an addition like the cell fracture modifier seen on the Mimic form, but instead there will be fewer rock fractures and they essentially orbit the inside of the blob and emerge from the lava blob while following an orbit rotation located in the centre of the blob.
The transformation form will need a lot of work, but the plan for the models is already laid out. This from will take reference from the Crash Bandicoot spinning model, where the Crash mesh is essentially mirrored on four sided and with stretched parts of the body surrounding Crash to create an artificial look of the model spinning. This is then spun in the game engine and creates a very convincing animation of Crash Bandicoot (Crash Bandicoot, 1996) spinning at full speed. The transformation model for the mimic will follow that same principle but with different design. The animation will start with the lava blob of the Idle form deflating down to a puddle, where rocks will start to rise and spin, however the rocks will be stationary but will be given a somewhat stretched effect to make it look like the rocks are spinning at really high speeds when the model spins. Finaly the rocks will start to come together and cover a base lava model that somewhat resembles the Mimic form, which will end with the entire lava body, fully recognisable as the Mimic with the complete rocky outer armour.
As for the Mimic form there may need to be some detailed sculpting on the inner-lava model, and potentially the lava-blob from the Idle form also, or it may be better to use a lava/magma texture here instead.
All three of these models will need a low-poly version so they can then be baked down and textured.
Conclusion
In conclusion, this project was a very great learning experience of the what it is like to work with a client on a specific piece of work, but also a great opportunity to learn and develop my skills as a game designer, mainly the skills of using Blender , basic modelling and sculpting. I was also very proud and happy with the work I was developing and felt that the Tomebound project was something I could really find enjoyable.