Interactive Project
The final project of our first year and arguably the most important. This had us follow a plan in teams to create some sort of interactive experience such as VR, AR, Touchscreen etc. The experience had to be catered towards a specific community/group of people, ours being school/educational groups. The overall goal of the project was to create a working state of our experience while portraying the need/usefulness of the experience to the chosen community.
The best way to create such an interactive experience was to create a game out of it. This was also a chance to attempt something new, especially as game designers as we had not touched interactive games just yet.
Development Stage
As mentioned before, our chosen target audience was school/educational groups, which we chose because we wanted to create an experience that could teach someone something new. As always, we started with brainstorming and researching ideas to see what kind of interactive game we could develop and what we could teach through that.
In terms of educational apps and games, there are so many different examples and subjects that you could teach through games, that it was easiest to think of a subject and then think of what kind of game could be the perfect way to teach said subject. We looked at Geography and History as main subjects and brought up a few interactive game ideas, including a DDR style arcade game where you would be promoted to answer a Geographical or Historical question by stepping on the corresponding arrow on a floor game mat. We also noted how we could develop this with a touchscreen theme instead.
We moved to another idea as we thought that the style of a DDR game didn’t fit that subject well enough, so we started talking about the possibility of an application that would have the user explore cities/towns etc and can scan a building with the device camera. The application would then bring up corresponding information of that building so they could learn about the different historical cultures surrounding the building and any notable events of the construction process and beyond. We researched things like superimposition augmented reality for this idea, which is when AR objects are generated from real life imagery/scenes of different things.
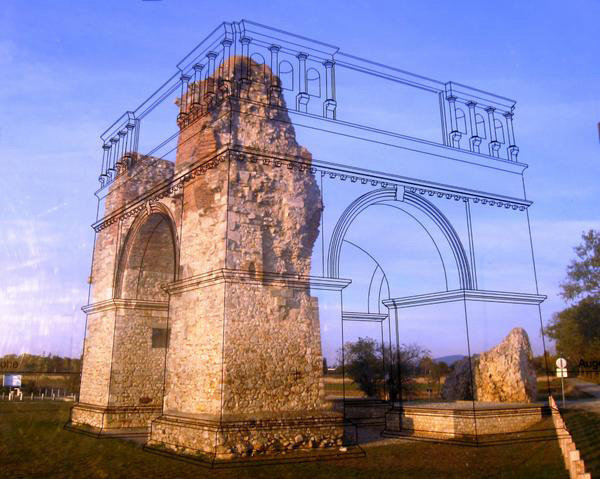
An example of superimpositional AR.
We decided that this was an idea we would stick with, however this had already been done by a google application, so we wanted to alter the experience to a more gamified app.
This is when we found the idea for our project; a Guess-who (Coster.T, 1979) style mobile app that would use notable buildings from across the globe rather than people. The app would use augmented reality to add that touch of interactivity and we would have 3D models of the buildings appear on a game token in the devices camera for the user to see and examine. The game work just like guess-who were the users ask questions about the opponents chosen building, such as the decade of construction, until one user could guess the others chosen building. The app would provide an experience that would teach school groups about the significance and other information about major infrastructure across the world and the historical culture behind the buildings.
My Tasks
For this project my task was to create the app's UI with working features as well as work together with our other game dev teammate to create the working AR system that would show 3D models of chosen buildings on 3D printed game tokens.
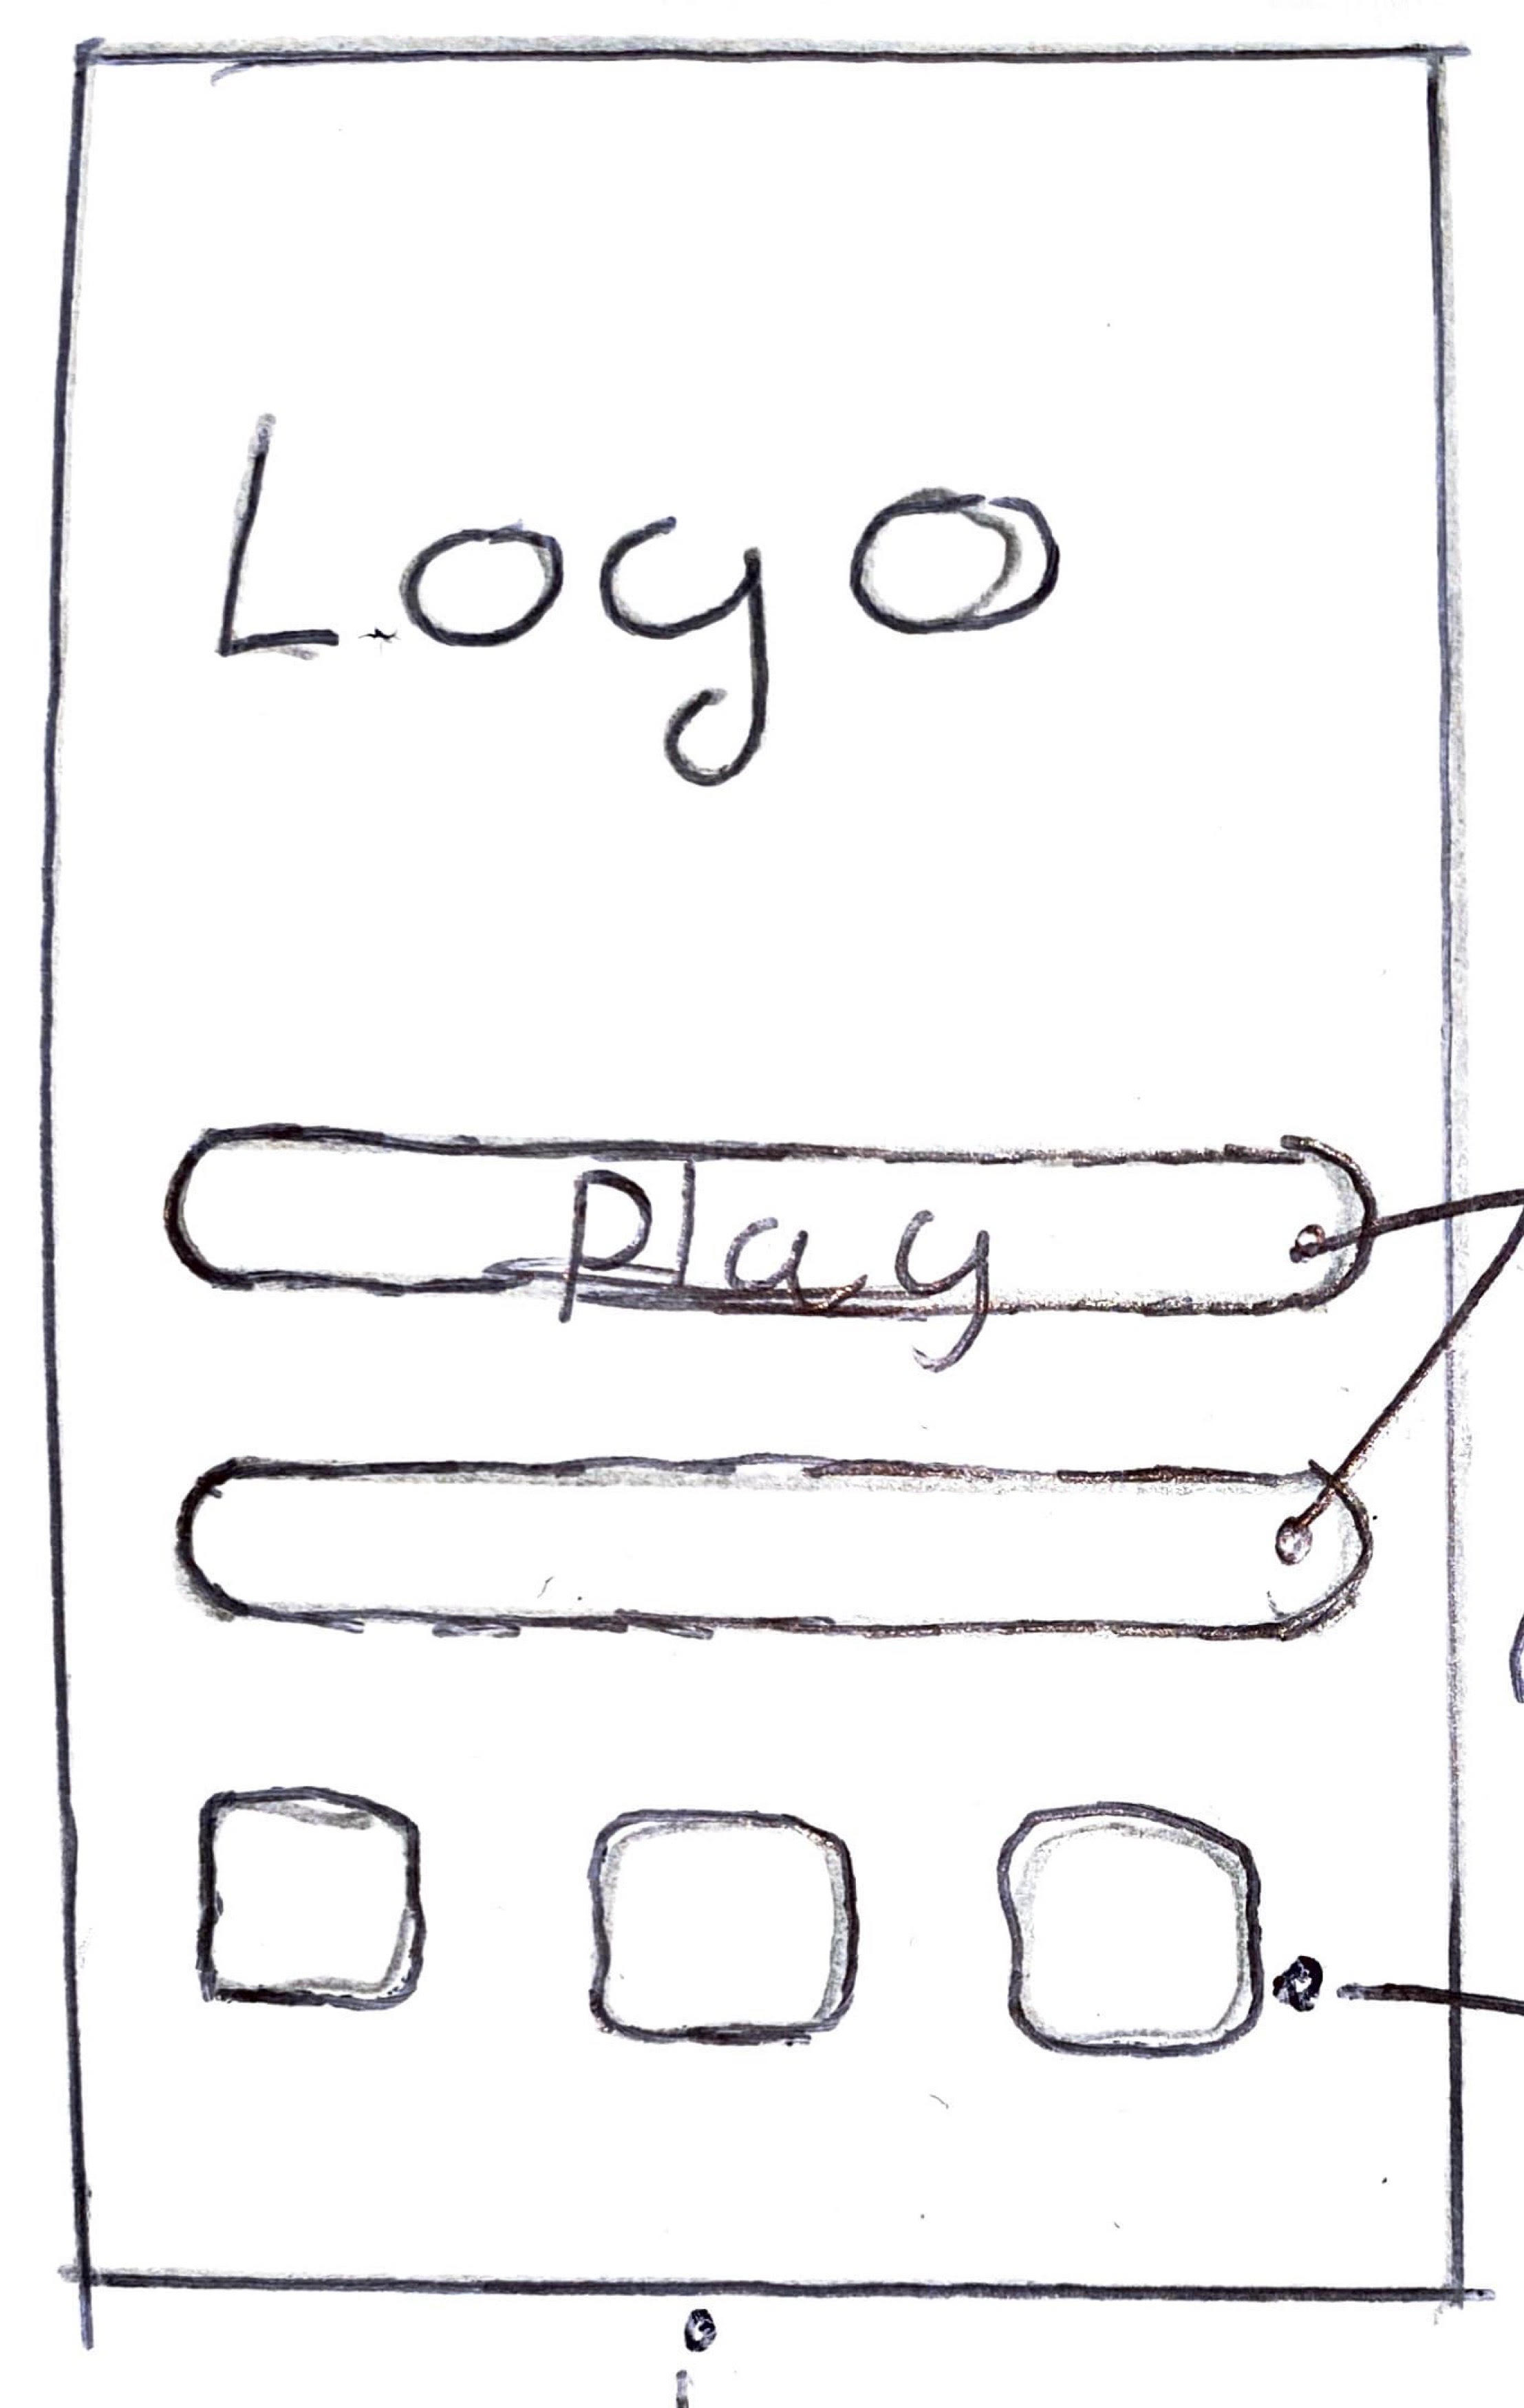
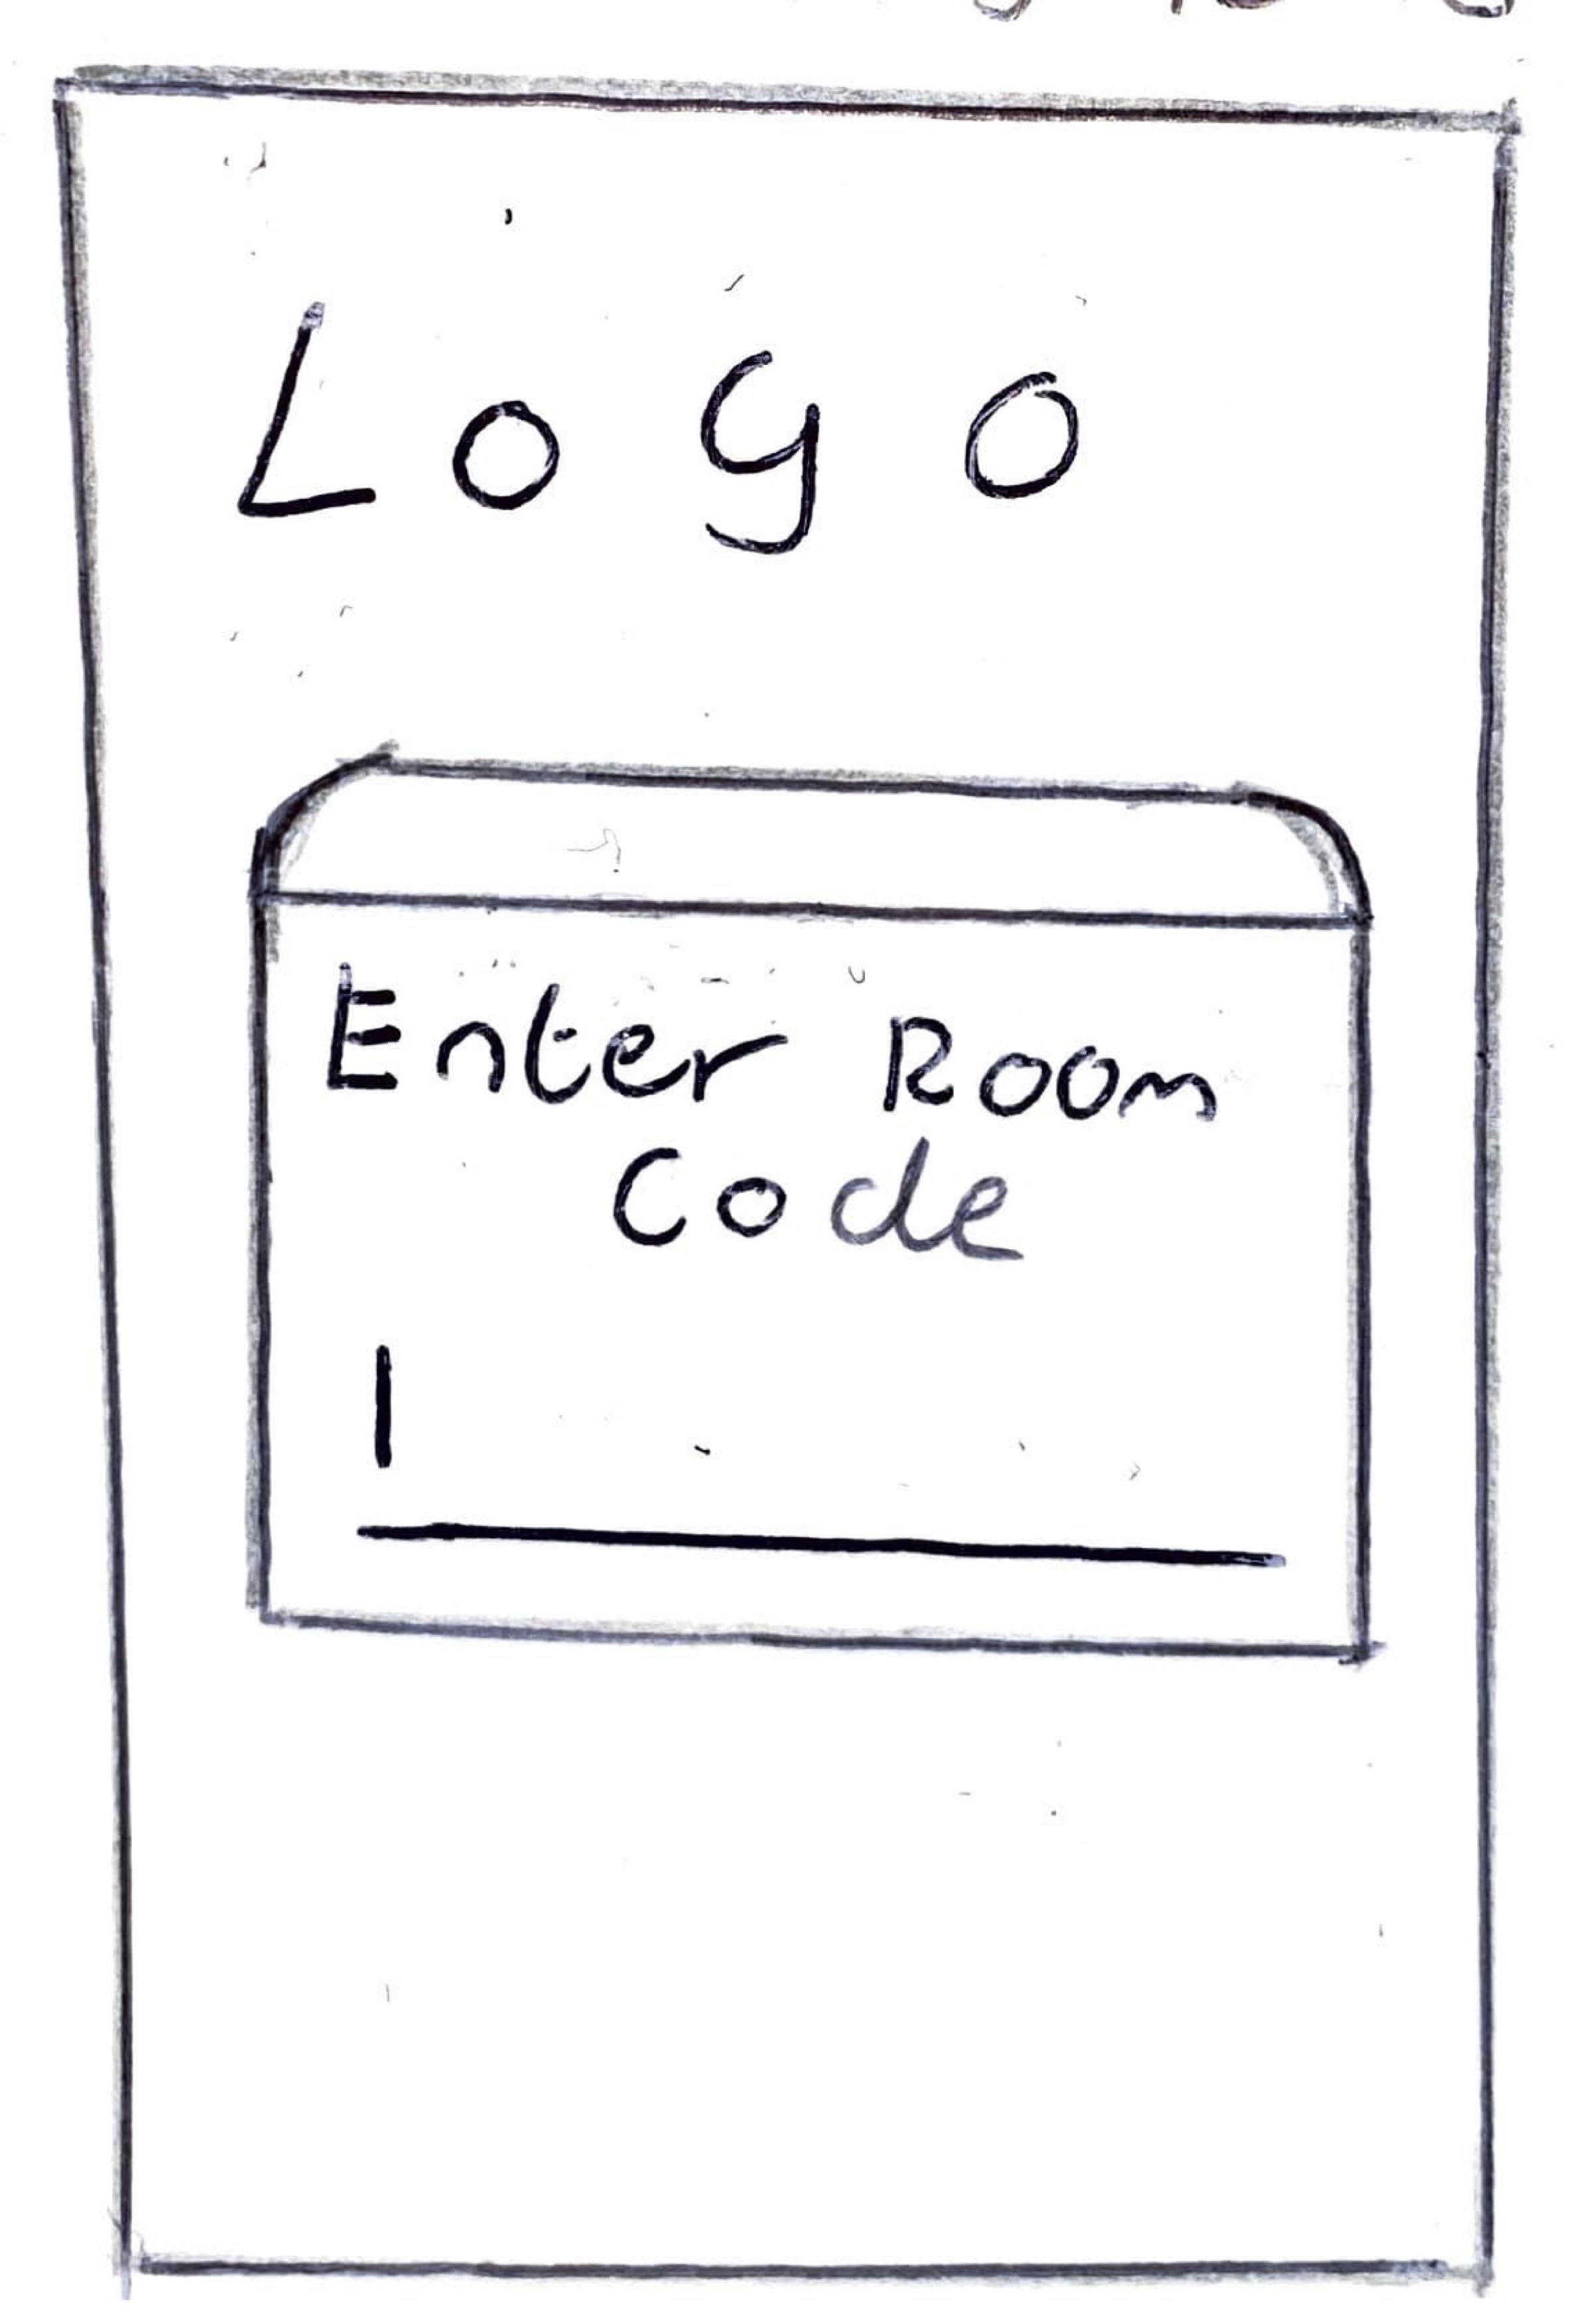
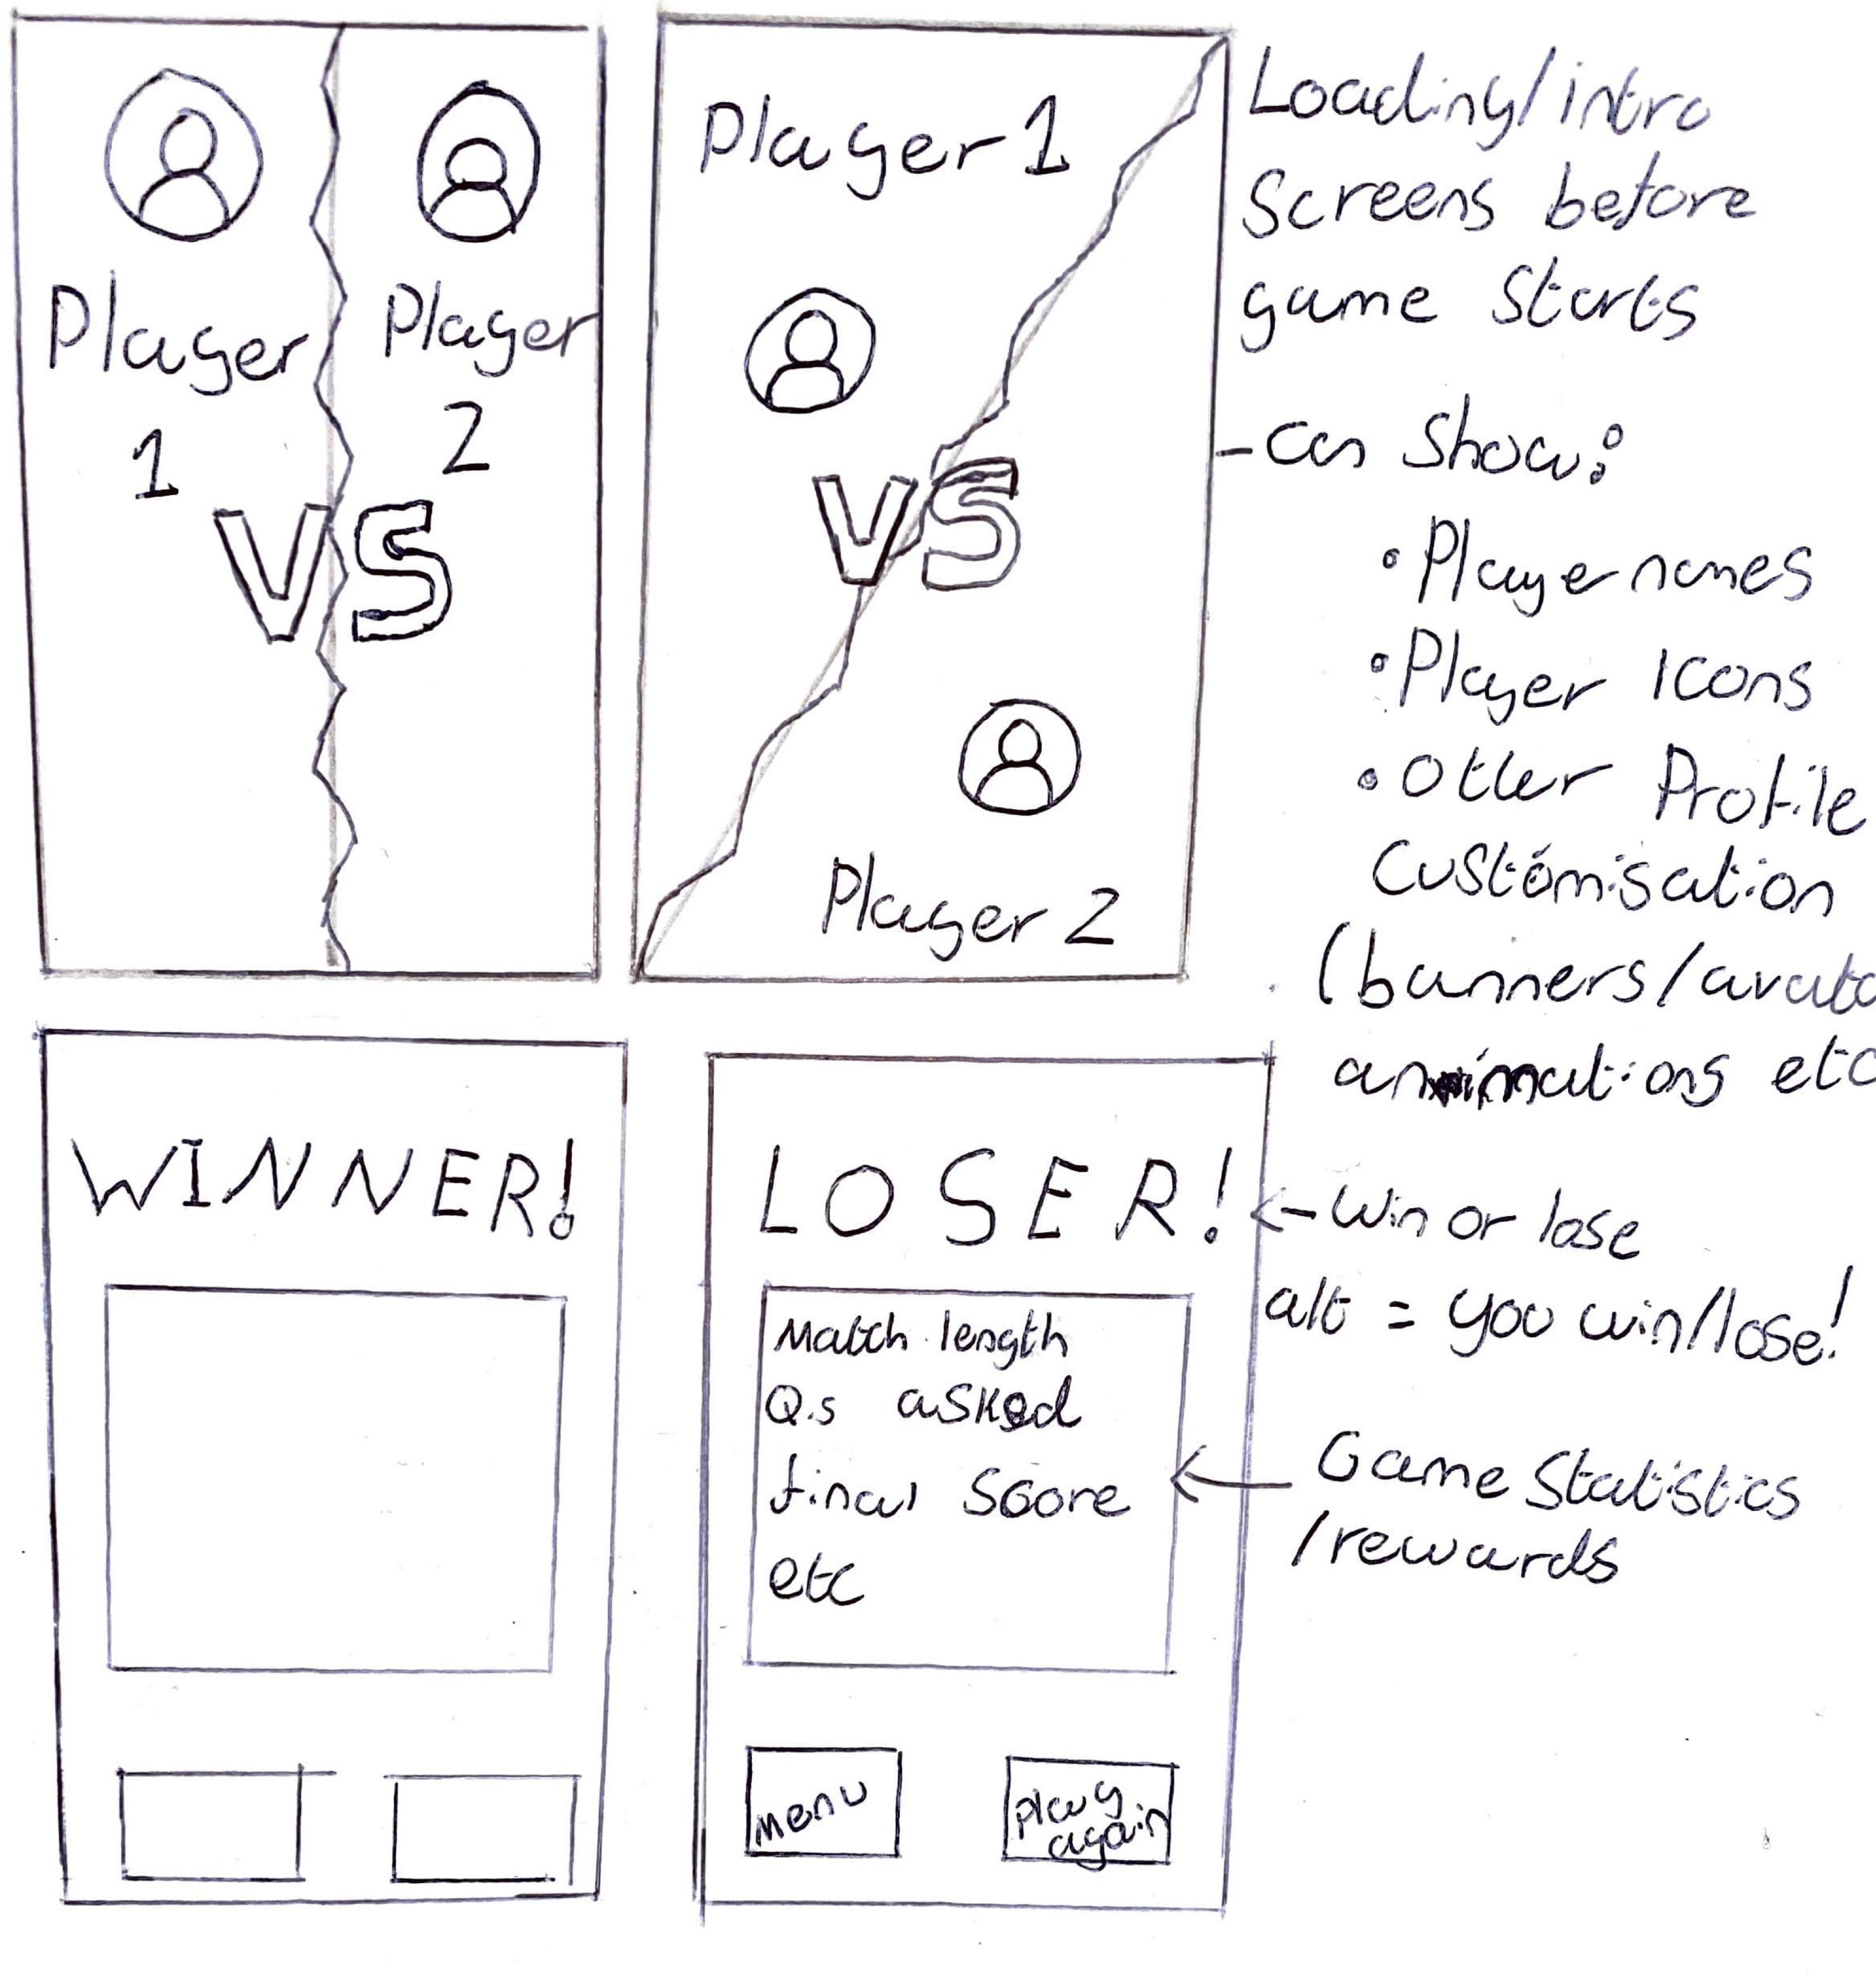
So, some small amounts of research went into different styles of UI design for mobile apps, which was followed by initial sketches of the various UI screens. Also, part of our research was to look into how people would play the game. We looked at games like Kahoot (Versvik.M, Brand.J, Brooker,J, 2012.) for this one as we wanted to implement a system where users could create their own rooms and invite their friends to them. Here are the main UI screens I sketched including a few extra screens such as a leaderboard screen.
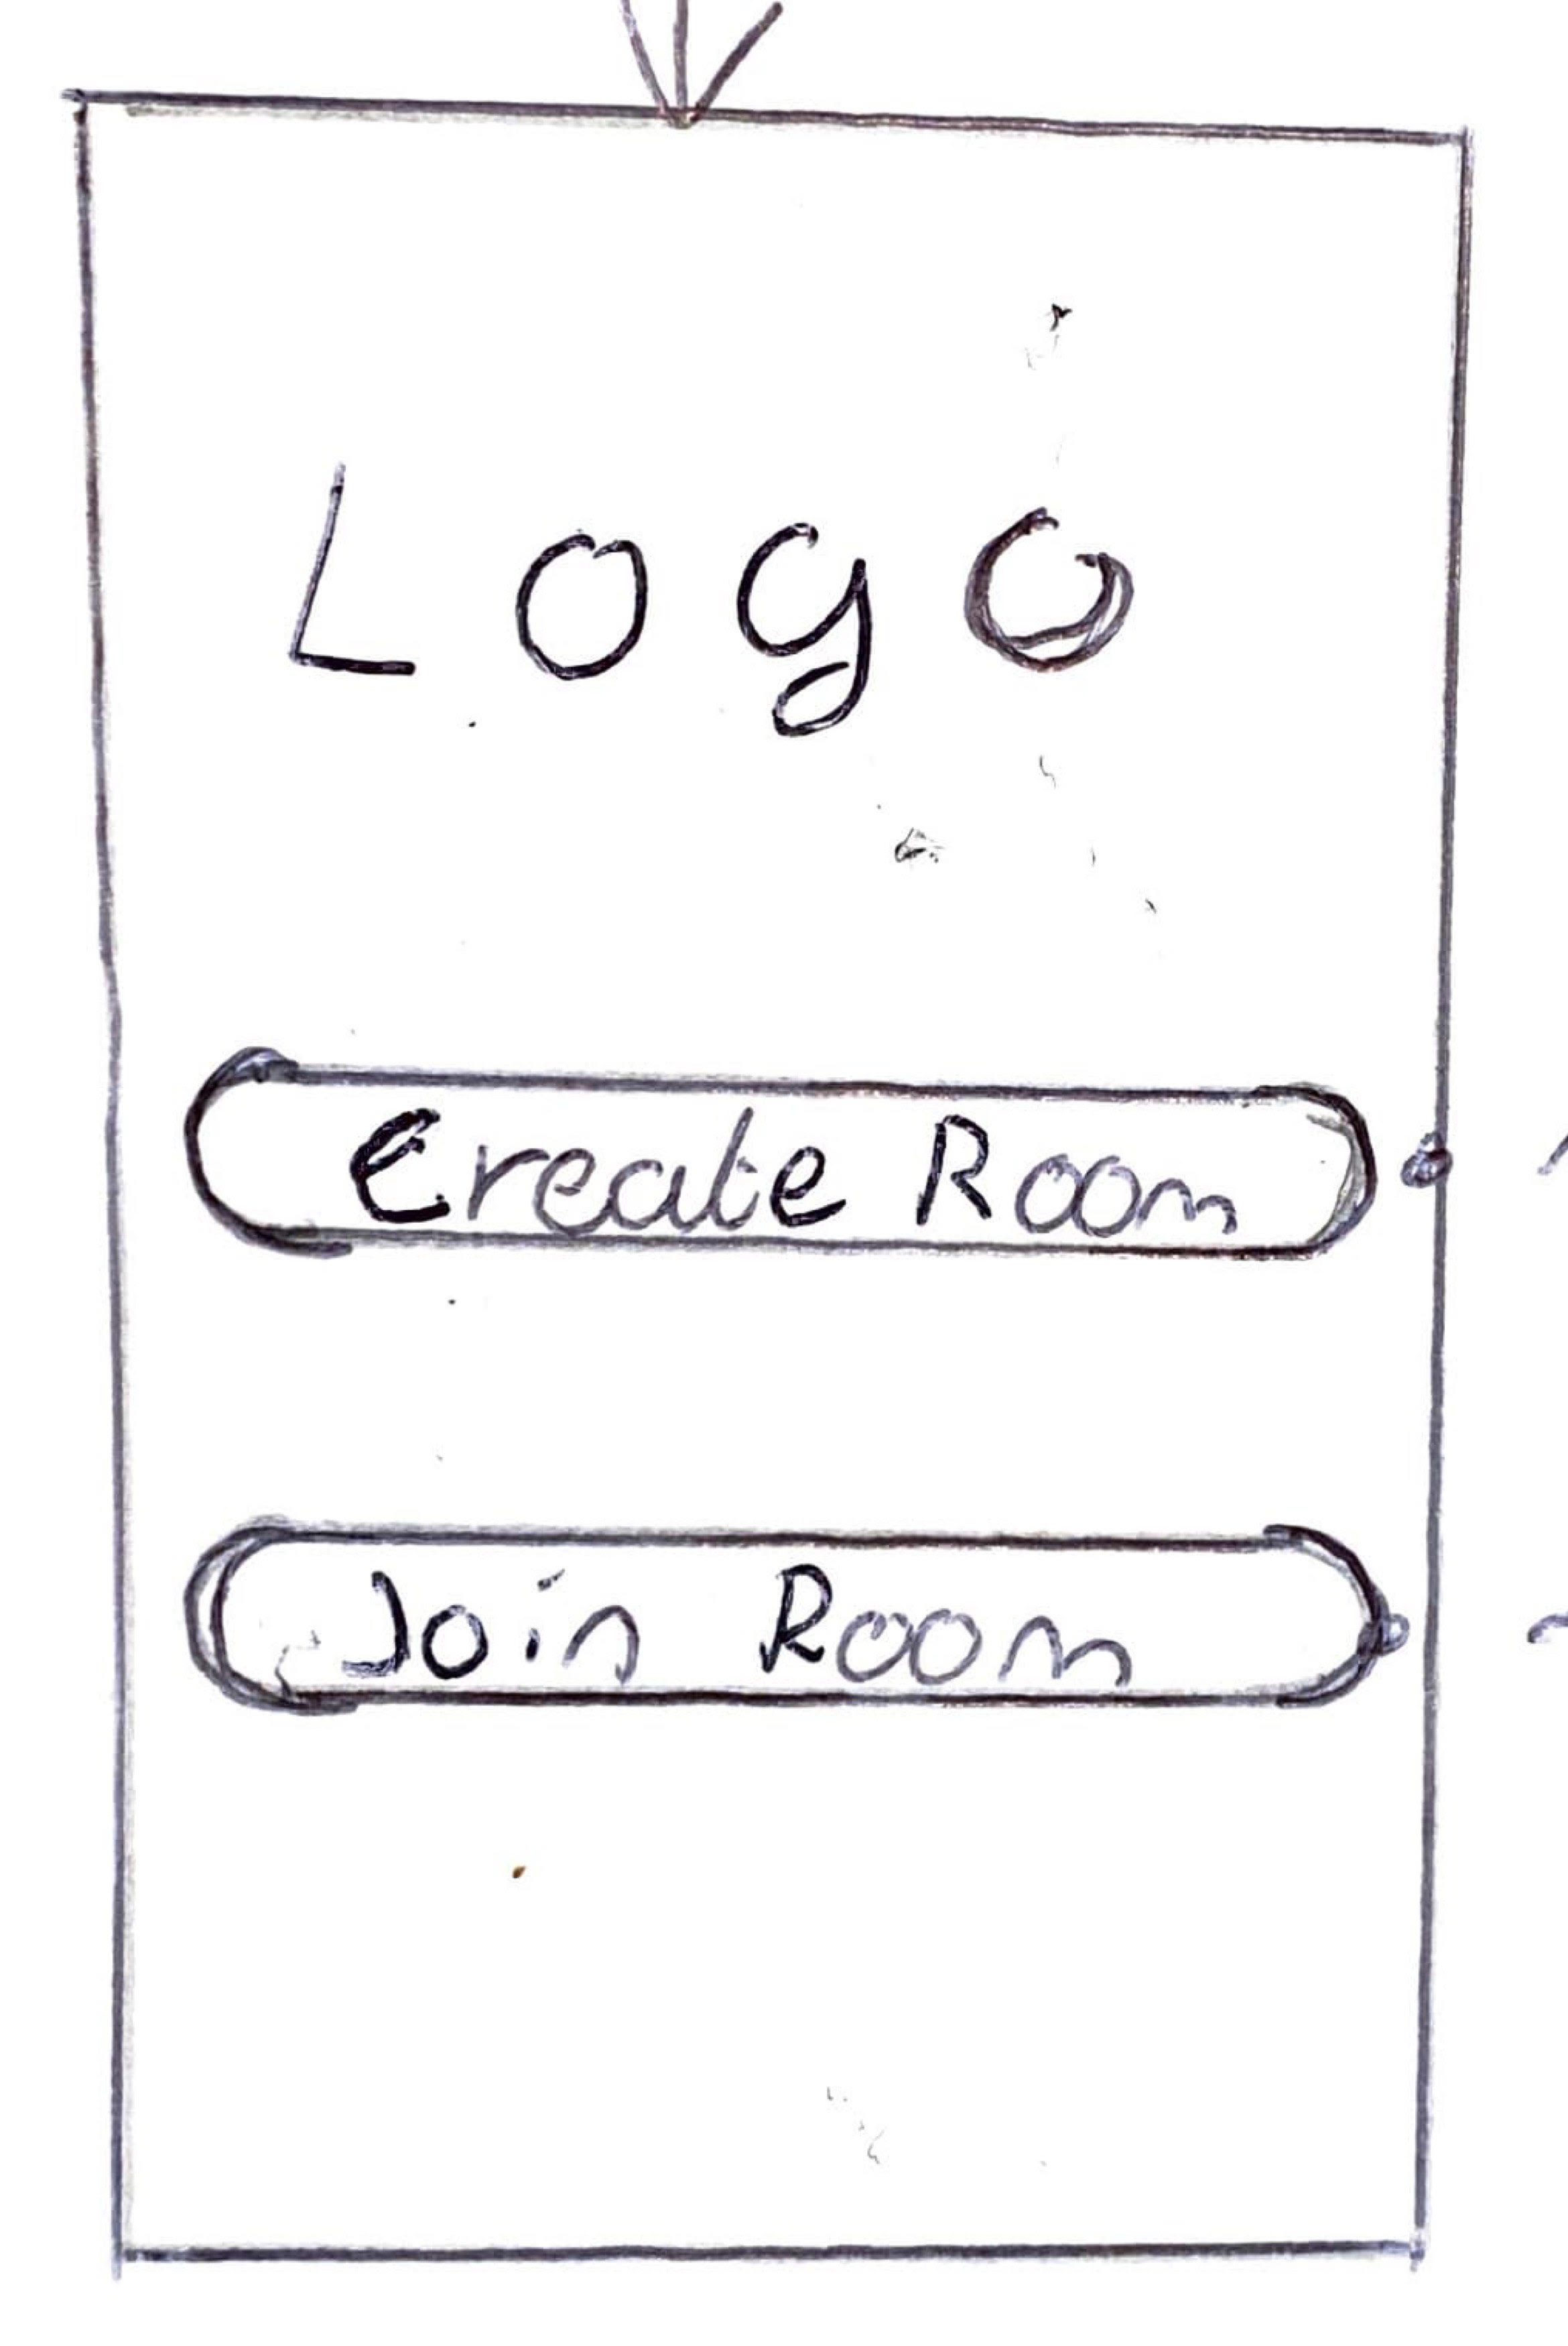
(Creating a Room)
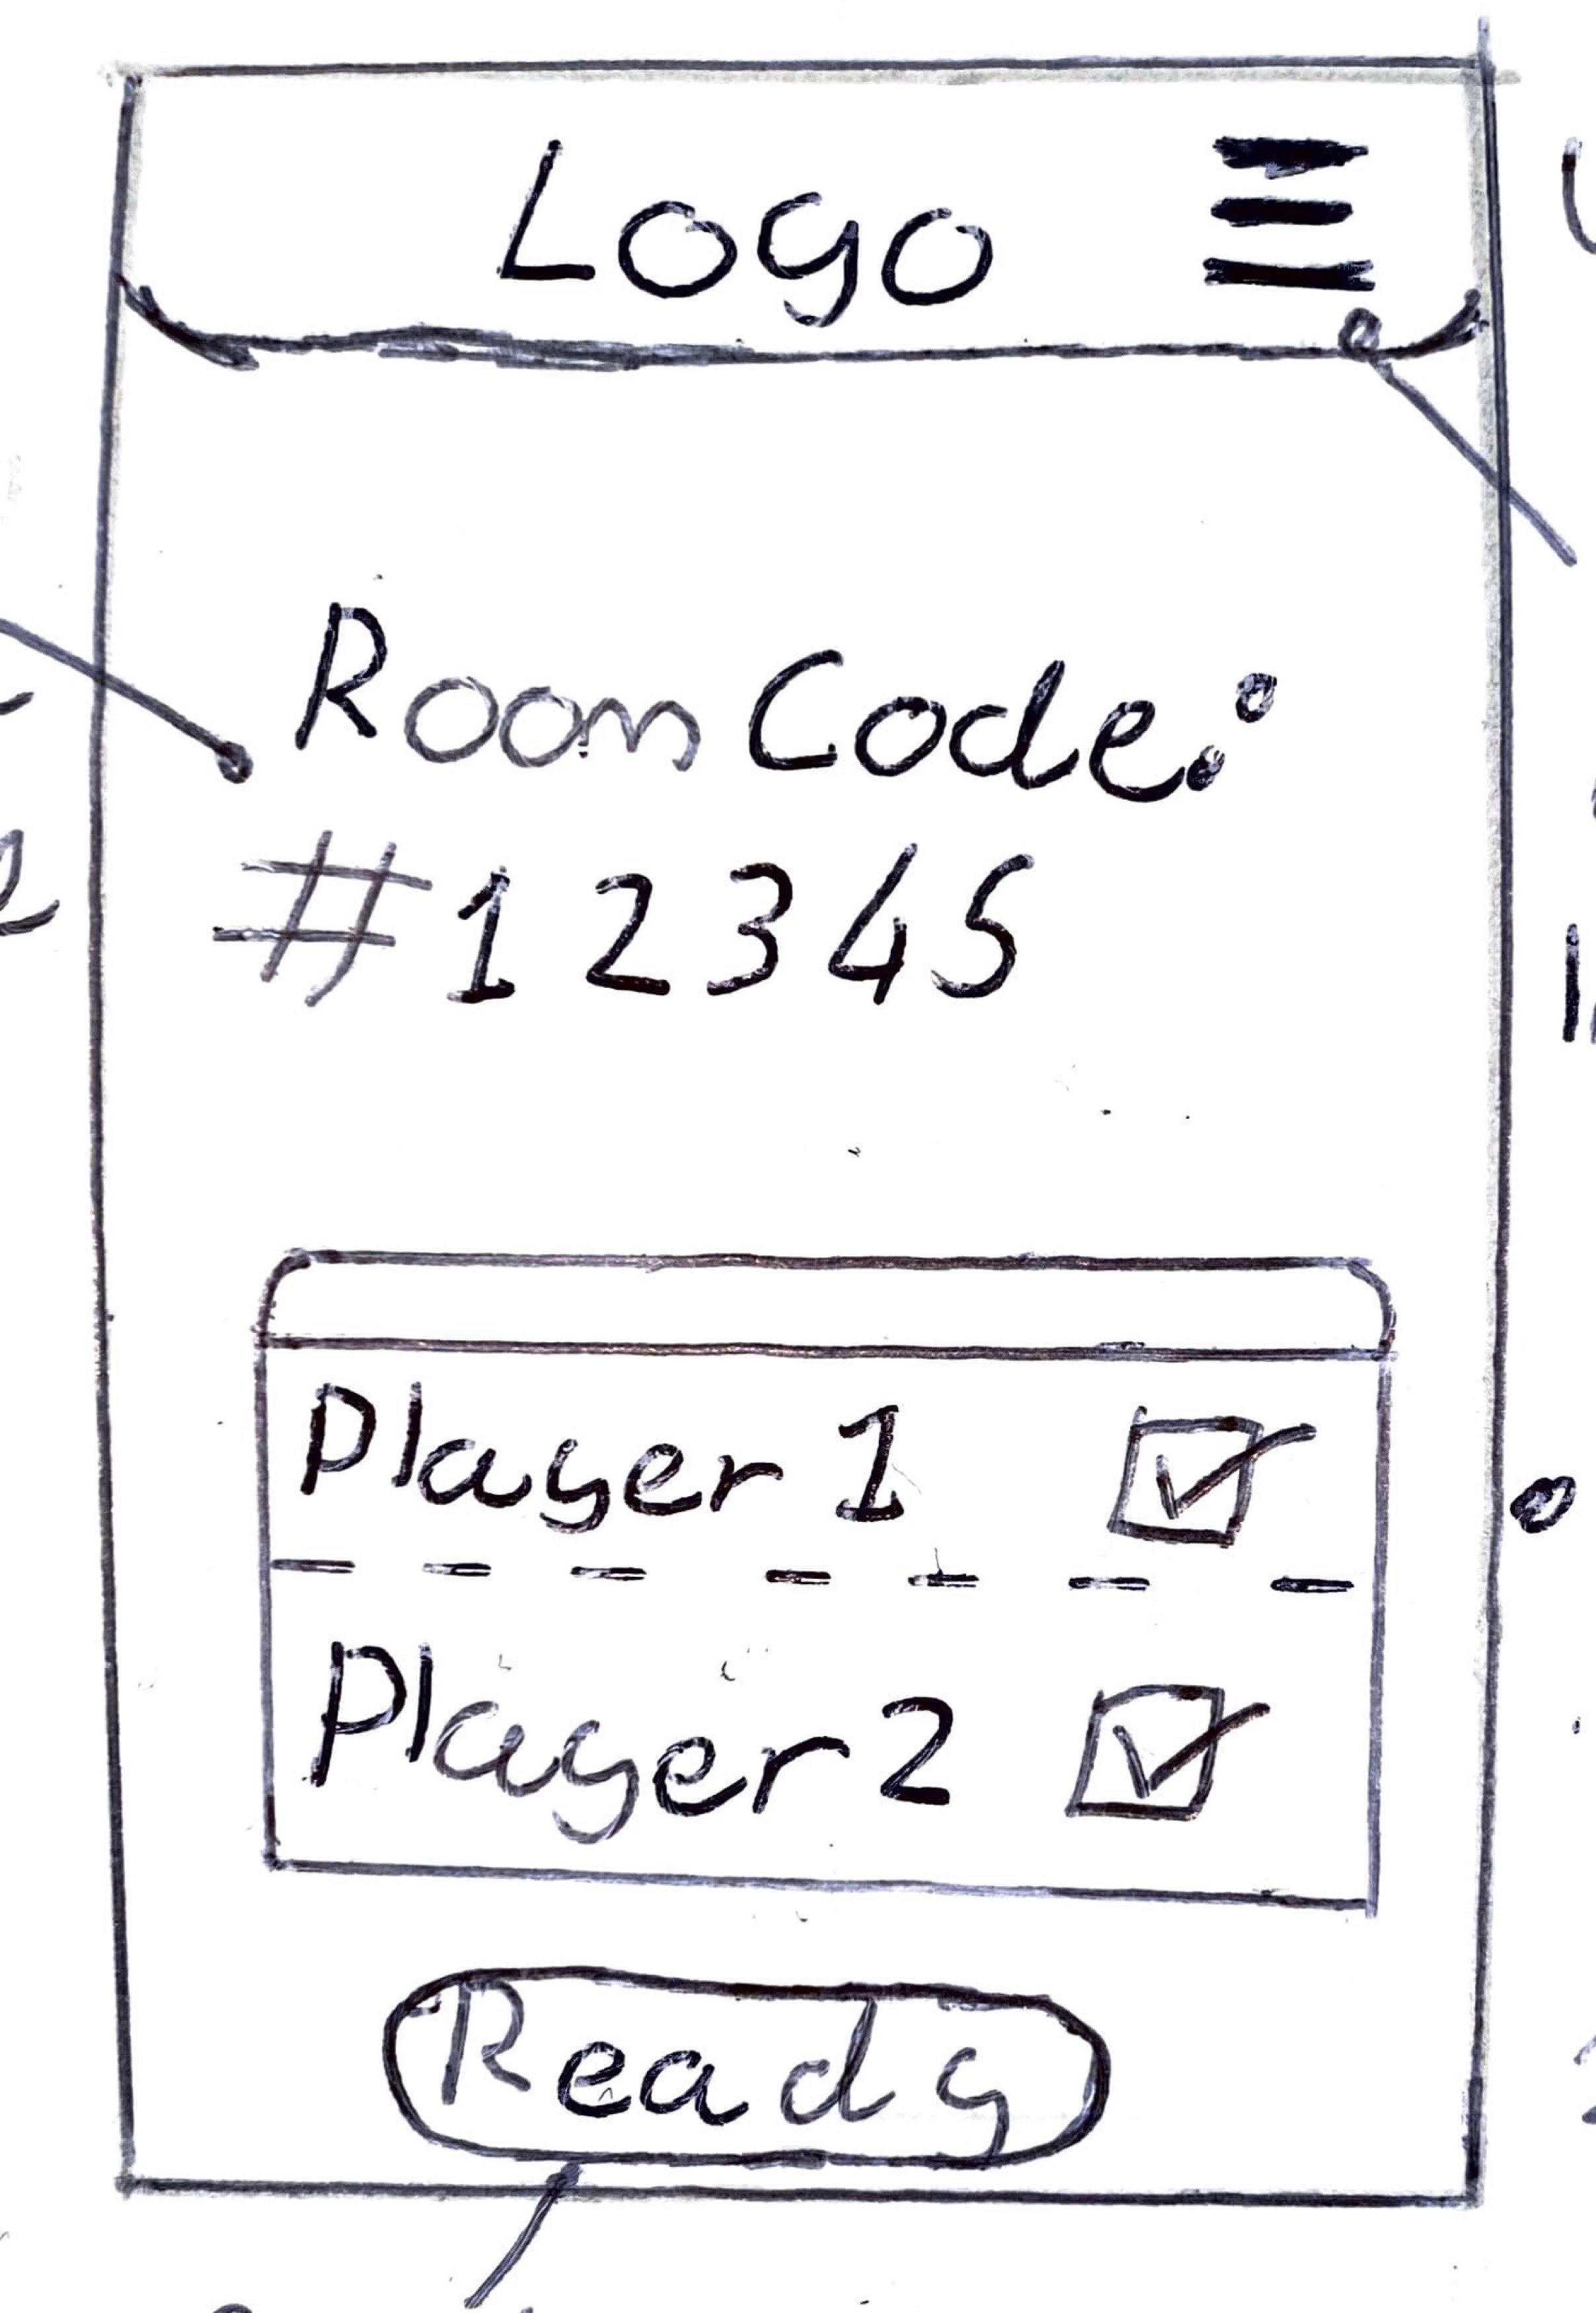
(Joining a Room)
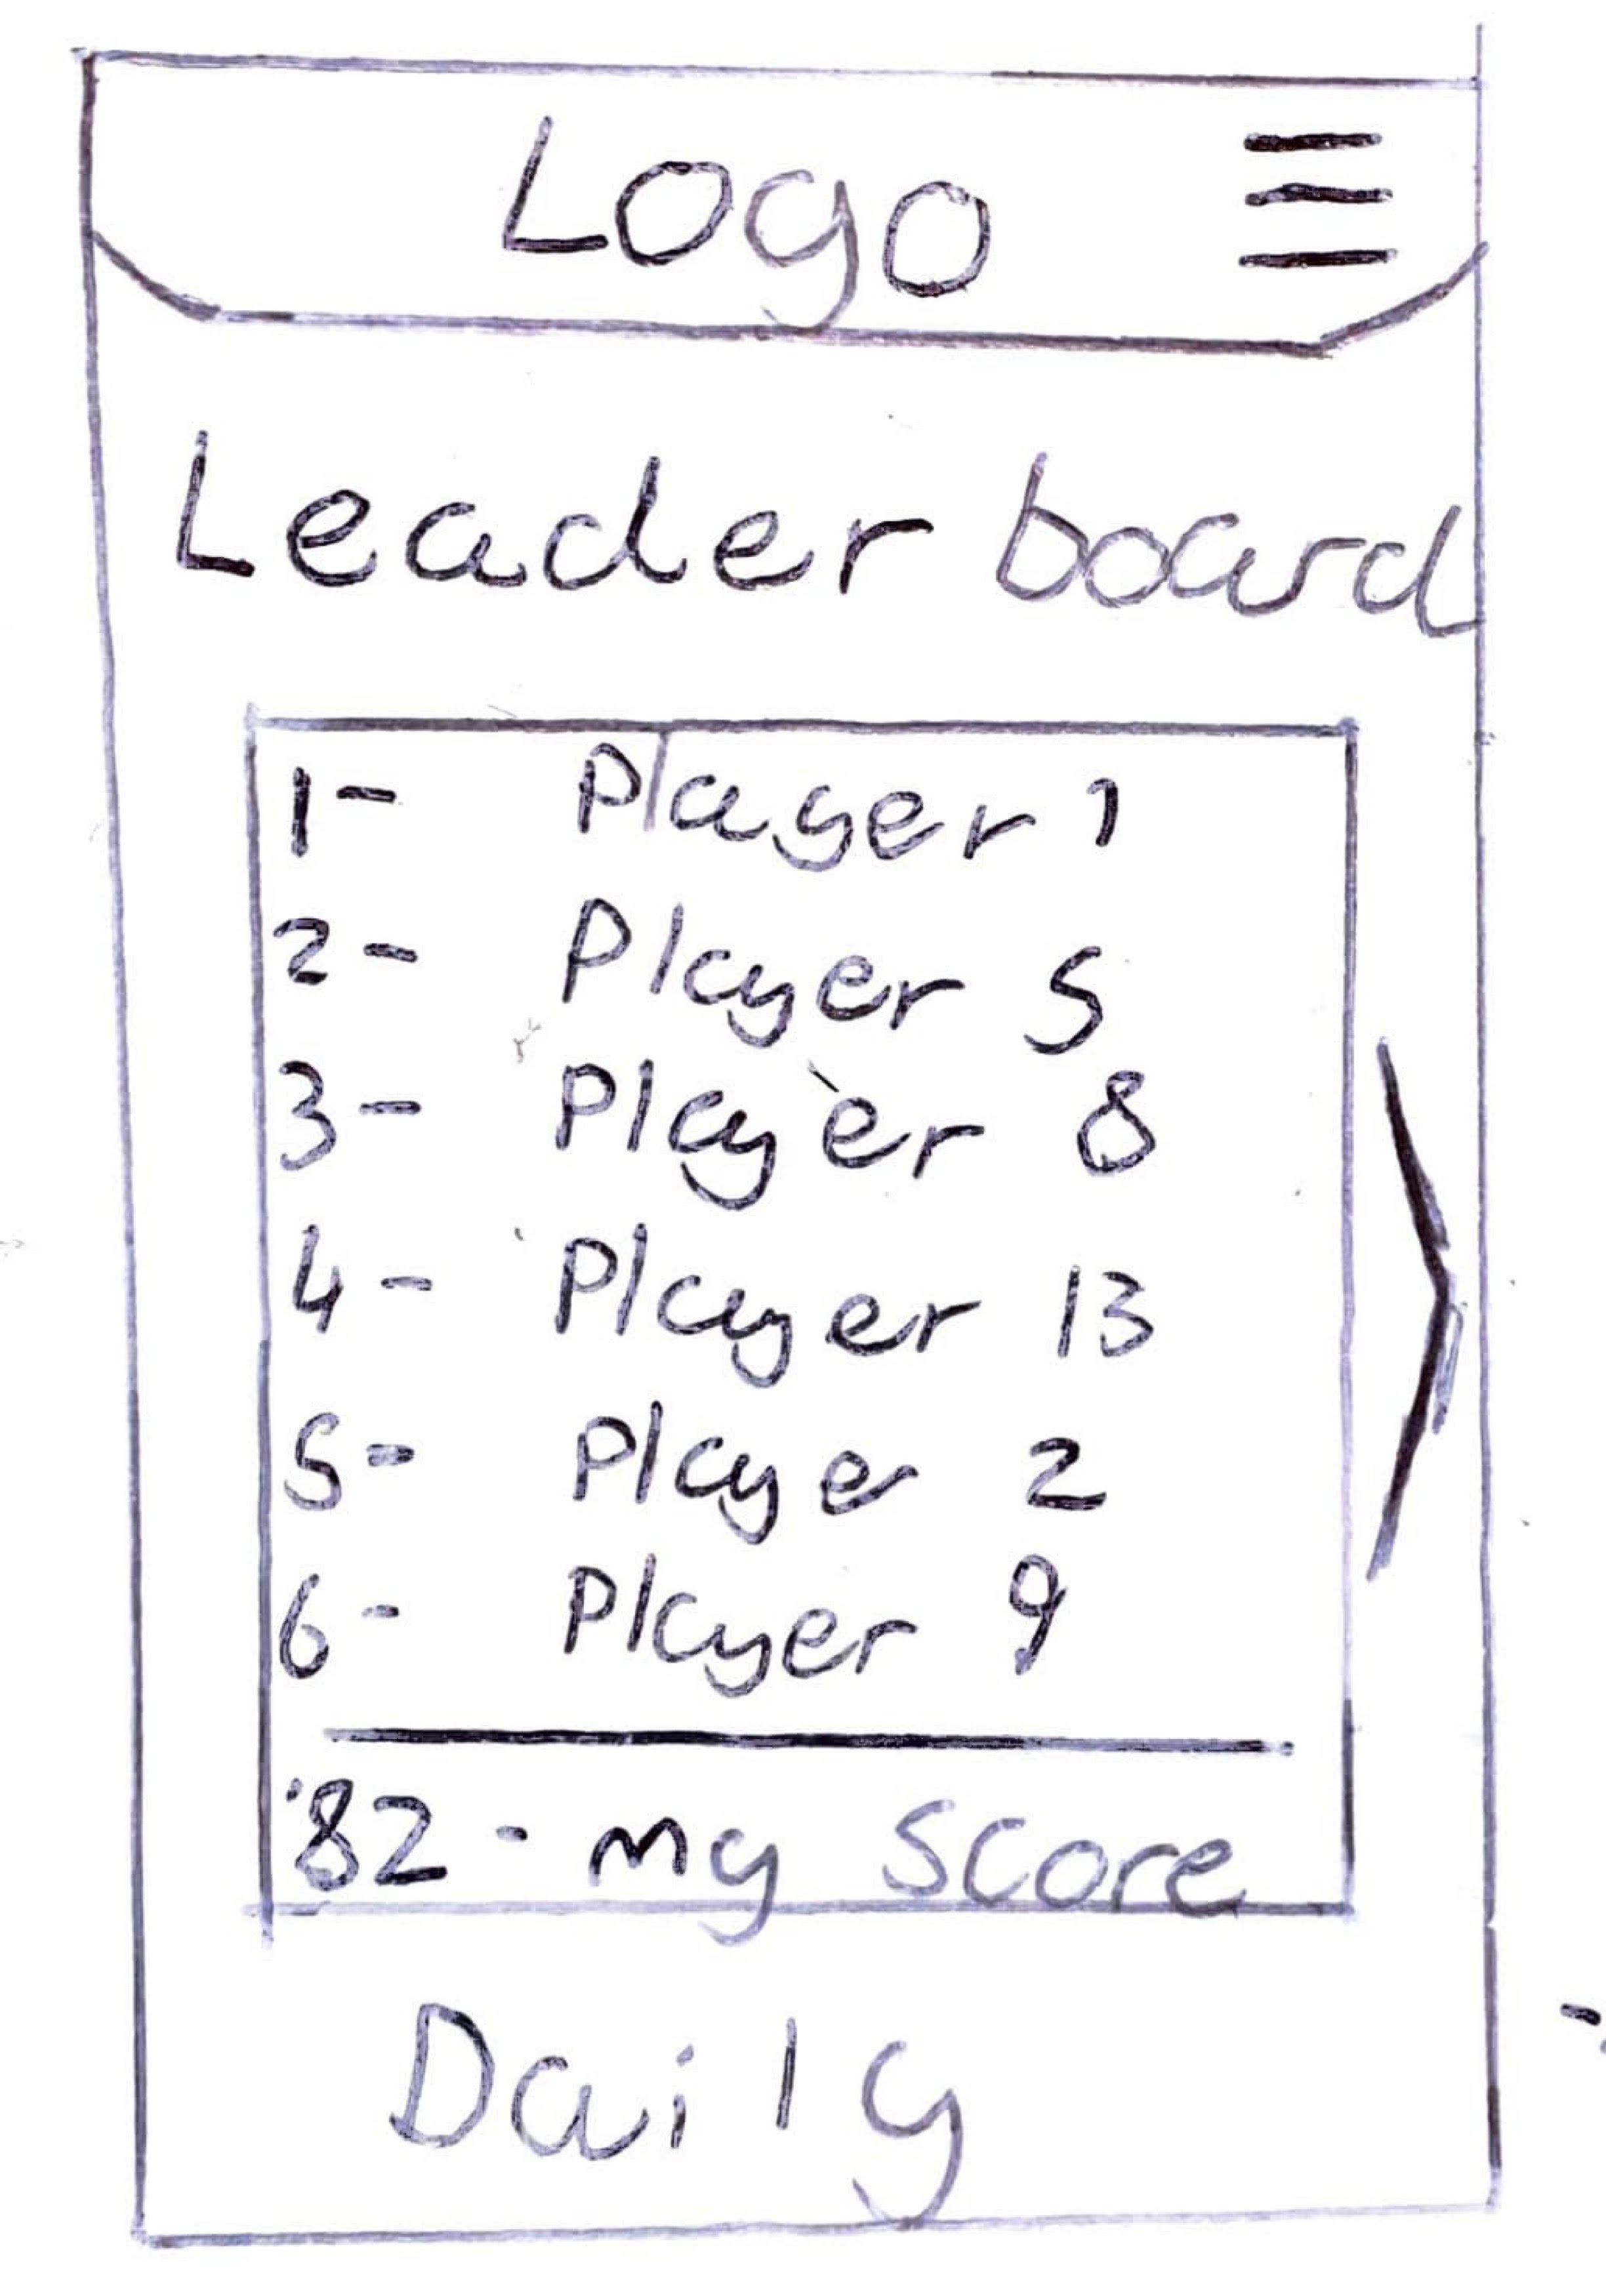
(Game Over Screen etc.)
At this point we had a solid amount of work for initial presentations and feedback on how to develop our work further. As soon as we had our brand guidelines, including colour schemes, fonts and logos from our designers we could start to create the finished versions of the UI screens. These were created in a standard 3D Unity project (Francis.N, Ante.J, Helgason.D, 2005) using the built-in UI toolkit with a few add-ons including a custom font. Here is a quick video demo showcasing the different UI screens throughout the app.
Getting the buttons to work and direct the user to the correct place was a pretty simple process. It involved using some basic code to hide screens and display new ones once a button had been pressed, or in most cases send the user to a new scene, as most of these screens were in different scenes.
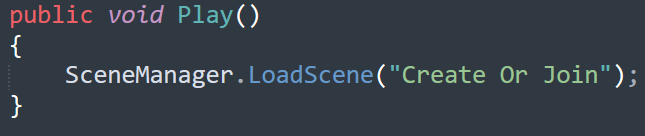
So, this section of code creates a new public action that opens a new scene when called. It is using Unity Scene Management to access different scenes from the Unity project so it can Load/Close them. This new action can then be placed onto different game objects, in this case it is attached to the play button causing the user to be directed to the "Create or Join" scene.
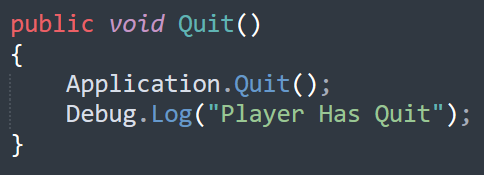
I used some pretty basic code to add a feature that allowed the user to quit the game. The new "Quit" action would be applied to the Quit button in-game so once pressed the Unity project would stop running. In addition, "Player Has Quit" would appear in the console, which was mainly so I could test that this feature worked properly throughout the game.
An options screen was included; however, it wasn't necessary for the showcase so it would be a future task for the project. There was no code needed to open this screen but instead changing some Boolean values on the UI screens in the current scene to false and/or true where appropriate, so that when the buttons were pressed to open the options screen it would essentially hide the current screen and unhide the options screen. This made it so multiple UI screens could exist in a single scene, but I could control which one is showed when an event happens.
The volume slider included used some basic UI tools including sliders and text that are coded to link to each other and a main audio mixer so that when the numerical value of the slider changes it would change the level on the audio mixer as well as display that level alongside in the text.
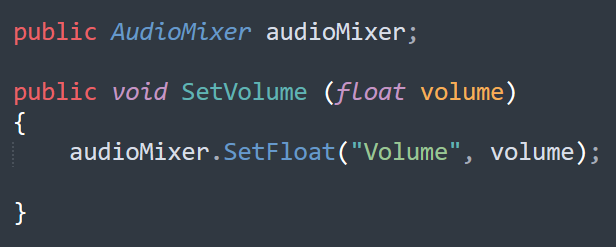
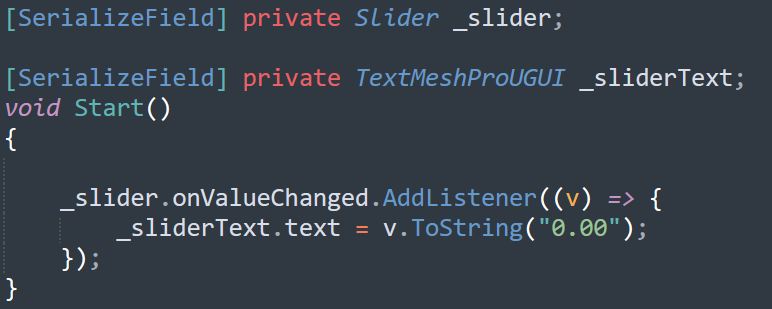
These sections of code show how the slider in the option screen works to change the volume of the game. The new action "SetVolume" is assigned to the slider so it can control the level of the audio mixer, while the second script takes the slider UI object and makes it so when the value of the audio mixer is changed from the slider moving (left and right) it displays that onto the text next to the slider to display the level of the volume.
So with the main set of UI complete I could start working on the multiplayer and the rooms systems.
I ended up using Photon (Photon Engine, 2022) to create the multiplayer, which is commonly used to create multiplayer projects in Unity.
I started by creating a basic server to host the app for players to connect to. Then some code was required to make players automatically connect to the server when loading the game (This is the purpose of the initial loading screen in the previous video).
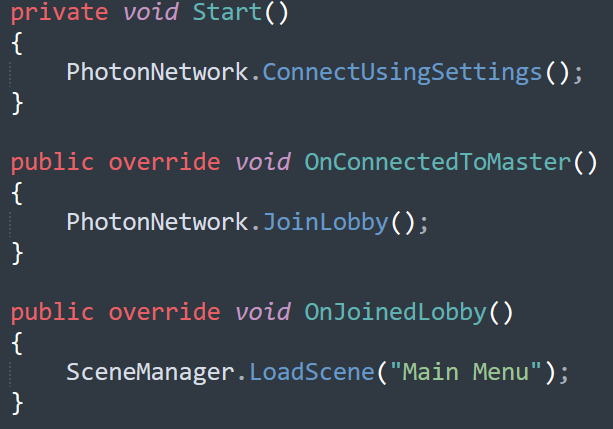
This code shows what happens in that loading screen. So, when the project is played it attempts to connect to the host server by using the JoinLobby tag, which was applied to that loading scene. Once the script detects that tag it can connect to the server, where it is then instructed to load the main menu scene.
So that is how players connect to the server, but next I had to create the system that allowed players to create and join different rooms. Photon was also used to create this system and Unity scene management and TMPro.
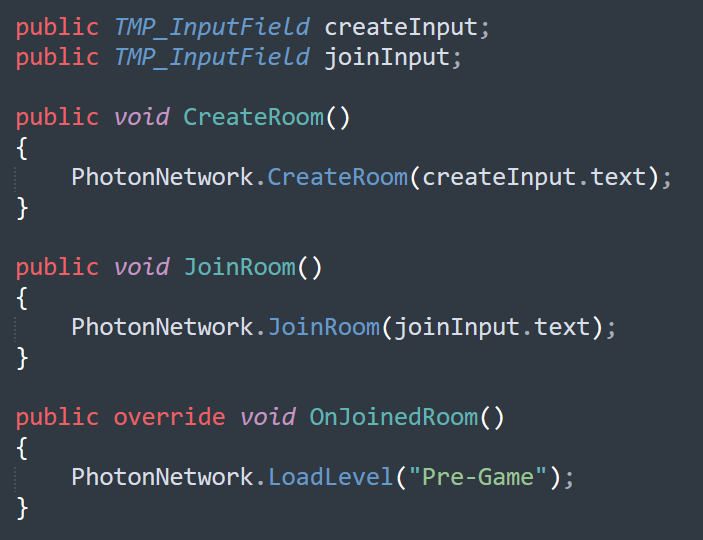
To make this script be simpler, the create or join room screen, create room code screen and the join room code screen were held in the same scene. I used the same method from before of changing Boolean values to hide/show the different screens. Otherwise this would've needed multiple scripts spanning across three different scenes, making it a more complicated system.
Both the createInput and joinInput fields are attached to two UI text input fields in the corresponding scene, one being named create-room-code and the other being named join-room-code. The rest of the script essentially allows whatever the input is from the create-room-code input field to act as a room name/ID. When the JoinRoom function detects text from the join-room-code that shares a name with an already existing, create-room-code input, it allows the user to connect to that room. When that room has been connected to, the user is directed to the next UI screen, which in this case is the Pre-Game scene where users select their playable building.
My last task was to create the working AR gameplay including different UI that showed game settings, players in the room, a list of different questions to ask the opposing player and the 3D model of the chosen building that would show on a game token in real time.
Let's start with a breakdown of the UI that is seen during gameplay, as it is pretty much what was already done with the previous UI.

In the top right there is a button that enables an options screen that brings up the same options screen from earlier in the project, but this one has a transparent background so the AR gameplay can still be seen. The top right shows icons for the different players in the room with the bigger icon representing which player is allowed to ask their question. The future goal for this would be to allow players to have their own customisable profiles including different emblems/profile pictures and titles that would display in the room. Finally, the button in the bottom will bring up a list of questions that can be asked for the opponent to answer.
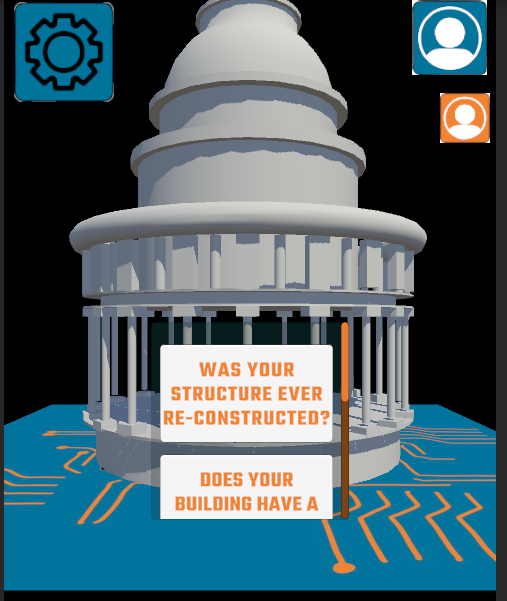
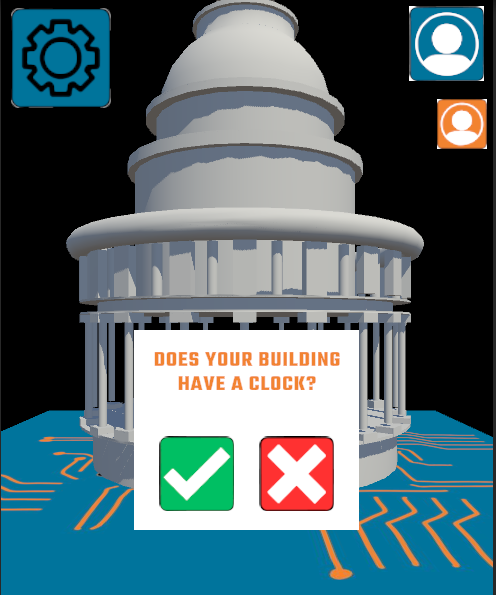
The first image shows what happens when the questions list button is pressed. There was a small selection of five different questions for the showcase of the app, with the aim to have many more and potential ways to ask your own questions with input fields in the future. Once a question is selected you are asked if you want to ask that question or keep browsing (the second image).
Now for the final part, creating the working AR. We used Vuforia (PTC Inc., 2011) to create this, a common tool used in creating AR Unity projects as well as using AR for other industry purposes. We started with the admin like setting up an account and creating a database for the place chase app. A database is a collection of different real word targets, including images and 3D models. This is what the device's camera would track to create the buildings. Our designers and CAD teammates had created some different designs for the game tokens and had them printed ready to be tested.
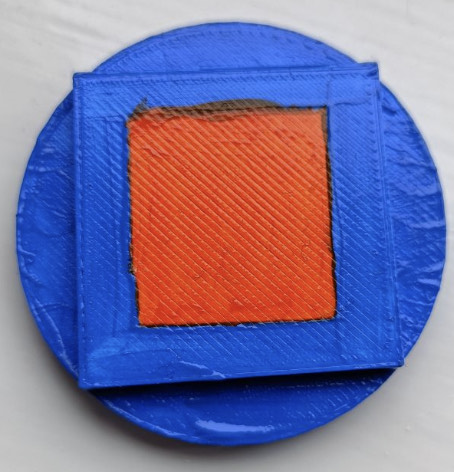
This was one of the game tokens that featured a square design on the top, which was going to act as the image target for the camera to track. So, I took it into testing to see if the camera would be able to track the image and display the buildings on that image. We ran into the problem of the buildings not displaying on any of the tokens. After some investigating, I found that an image target is comprised of "Features" which are essentially notable points of the image that are easy for a camera to detect.
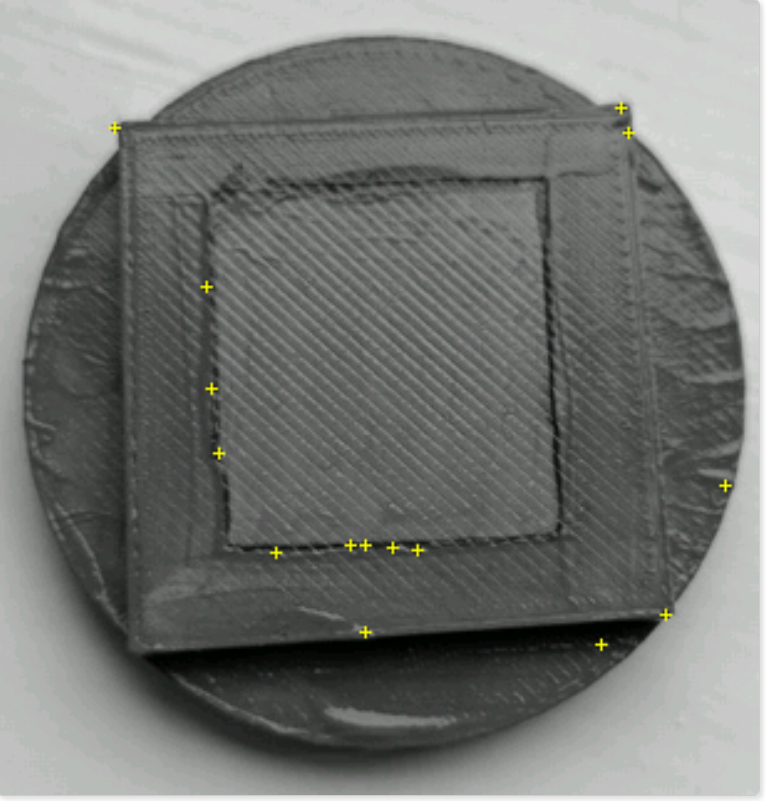
Features are shown as yellow plus signs in the Vuforia database, and as you can see the square token had very little features, making it near impossible for a camera to track. To fix this we decided to add patterns to the shape on the token in an effort to add more features.
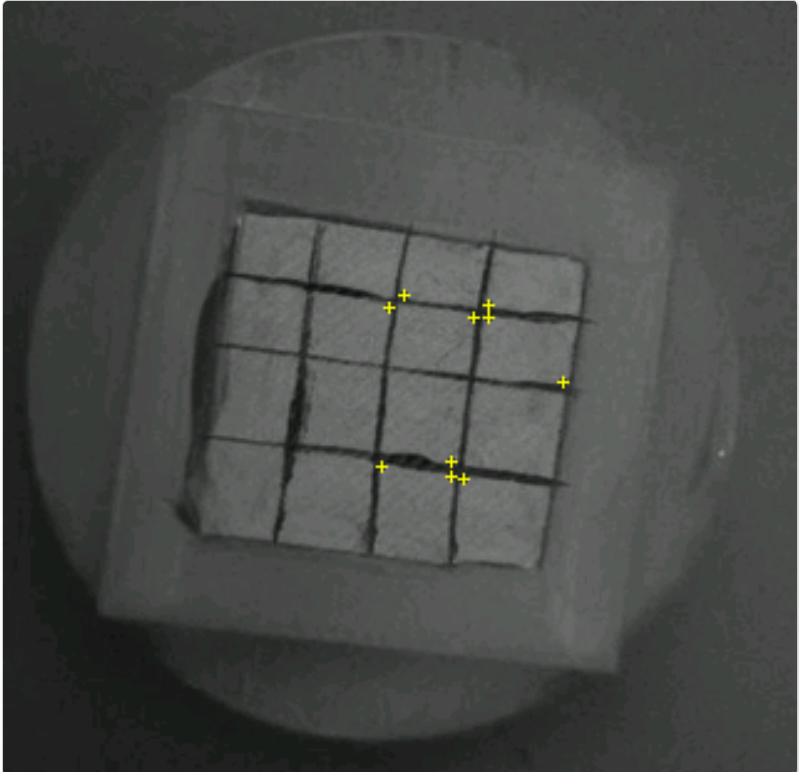
As you can see, this failed as the version of the token with the patterns lacked a lot of features. This left us wondering what we could use as a substitute that would present the brand and the game while having enough features for a camera to track.
We came up with the idea of trying to use the brand logo of our project, Global Reality, on the tokens as it seemed like it could have a lot of features while staying relevant to the project.

Putting the brand logo into the image database made it seem like it was successful as the number of features on it was substantially more than the previous token designs. I took it into testing, and it was able to be tracked consistently enough to showcase the project. So with the AR working, I finished up the project by adding the 3D models of Notre Dame, St. Pauls Cathedral and Acropolis into the game.
You may be wondering how the project knows what building to display on the token at what time. This was simple to get around as I just created a game scene for each of the three buildings. So, if a player selected St. Pauls in the Pre-Game scene as their playable building, it would direct them to the St. Pauls AR scene where only St. Pauls cathedral would appear on the game token. This way it is also impossible for users to cheat by just aiming their camera at the opponent’s game token to see what building they had selected.
Here is a short showcase of the AR working in the St. Pauls game scene.
Lastly, we used the Unity Remote app (Unity,2023) and the iVCam app (E2ESOFT, 2023) while my phone was connected to my laptop that had the project running to display the place chase game with all the working parts included through my phone screen. I had to record this showcase through my laptop in the Unity engine as when I recorded it on my phone it would not show the AR building in the video. We were now ready for the end of year transmedia event and to showcase our latest project.
Conclusion and the Future
The transmedia event went well, and our project managed to stay consistent enough throughout the whole event. Passersby were impressed with our work while we explained the thought processes behind the project, what each team member had achieved and lastly showcasing the place chase game to them and letting them play around with the augmented reality a little.
This project was a good opportunity to step out of my comfort zone and try something new. I thoroughly enjoyed learning how to create an AR application and I also got some pretty good practice in making some good UI design.
There were things that I didn't manage to achieve that I would've liked to such as making a working system were the questions asked are seen by the opposing players, even if it was basic. There is a lot of future potential for this application, with development of the base app through more player customisation or improving the gameplay experience with custom questions and more available buildings. There is also opportunities for an app like this to branch off into different genres, similar to how something like Monopoly (Magie.L, Darrow.C, 1935) has different regional versions of its board game, we could create different game modes for each continent / different countries or well-known cities with accompanying merchandise. It could go beyond buildings however we would want to stick with an educational theme. With this amount of focus and development this application could have the potential to be used in classrooms for teaching in many different countries.
In the end I truly believe that we created an interactive experience that can assist different educational communities the importance of history and culture through landmarks.