
Just like in our first semester, we carried out a second client project in our second semester. This involved working with an external client or industry professional, on a proposed project, in order to gain some sense of industry projects and to develop our skillsets so we can be ready to tackle future challenges.
As a reminder, in semester one, I took part in the Tomebound client project. Tomebound is a fantasy themed action / adventure puzzle game that mixed elements of dungeon crawlers and Sokoban style puzzles into an interactive, adaptable setting to allow for intriguing puzzles that can be solved in many ways.
My work in that project involved developing an enemy character called the Mimic, which would take the visual form of the player and copy the players movement.
For a more detailed description of Tomebound, and my contribution to it from last semester, read my Client Project Semester One page.
Tomebound Phase Two Included a few different teams of designers and developers, all working on something different to contribute to the game. My work for this semester was largely focused on the Feature Finishing team. This involved continuing to work on assets and characters from the previous semester to get them game ready. In my case, this meant further development of the Mimic enemy.
By the end of the first phase of Tomebound, I had gathered a mood board of AI generated concept art and developed the third form model of the Mimic in Blender (Blender.org, 2002) This semester, I aimed to finish the development of all three forms.
I started my work by continuing from where I left off, which was working on the system of rocks that would feature on the Mimic's third form. Firstly, I worked on some fine tuning to the sculpting of the rocks, as well as some additional sculpting details, such as dents and erosion to the rock's sharp edges.
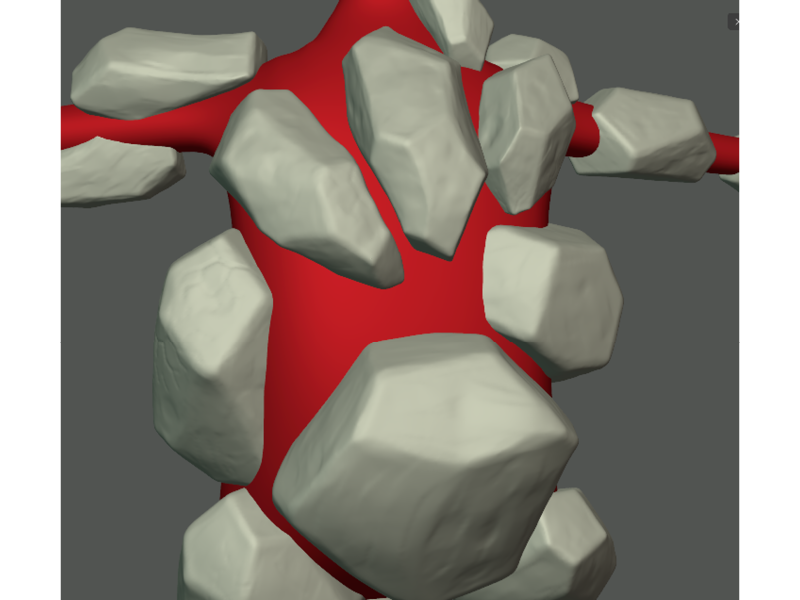
This was important because it meant that when I created the rock textures, I could use curvature and ambient occlusion generators to get better looking edge highlights on the rocks, as well as darker shadows on the rock faces.
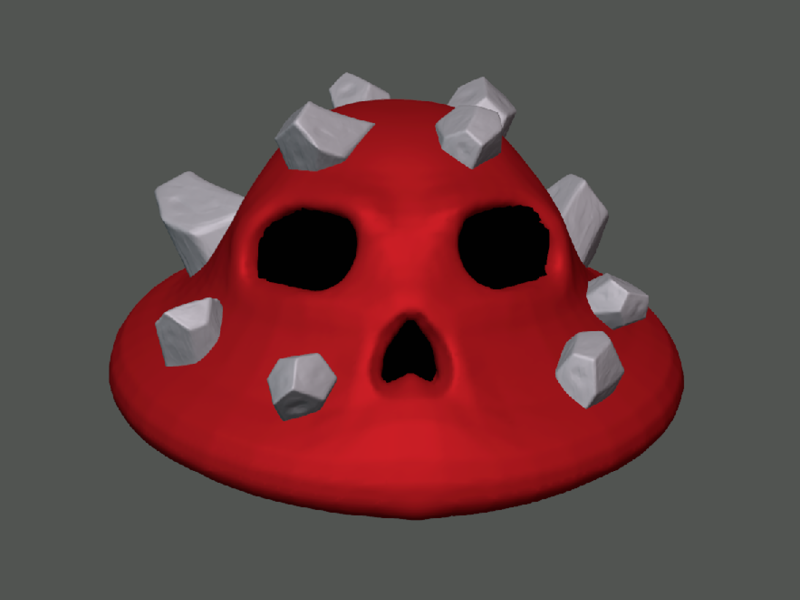
Before taking this set of rocks into texturing, I worked on the basic modelling of the first idle form, and the second transformation form. The Idle form was mentioned in last semesters project, and it involved a slime or blob looking creature with skull-like facial features and a few rocks that would orbit within the lava slime.
I started by modelling some crevasses into the blob, to create skull-like eye sockets and a nose. I then stole some of the rocks from the Mimic's third form, and placed them around the rock, tweaking the rotation and scale of each to make them look slightly different.
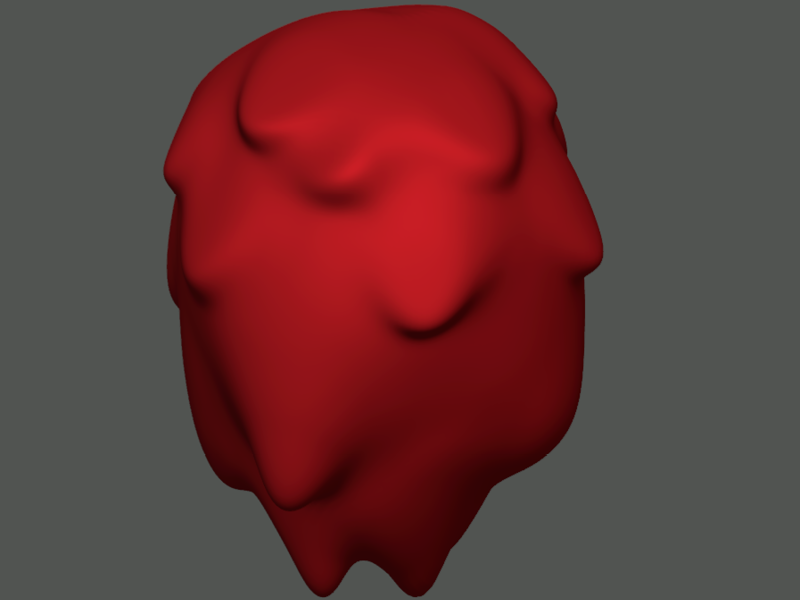
The second form of the mimic had no development in the last semester, but there was a description of what it would look like. As a reminder, the second form would have the blob from the first form, appear to rise as rocks and lava drops orbit the floating blob, almost resembling a tornado. There was heavy inspiration took from the Crash Bandicoot (Crash Bandicoot, 1996) spin model.
I started working on this with a simple UV sphere and creating an upside-down egg shape. After using a subdivision modifier and sculpting some drooping lava into the blob using the grab and snake hook tools, I was left with what looked like a floating lava ball.
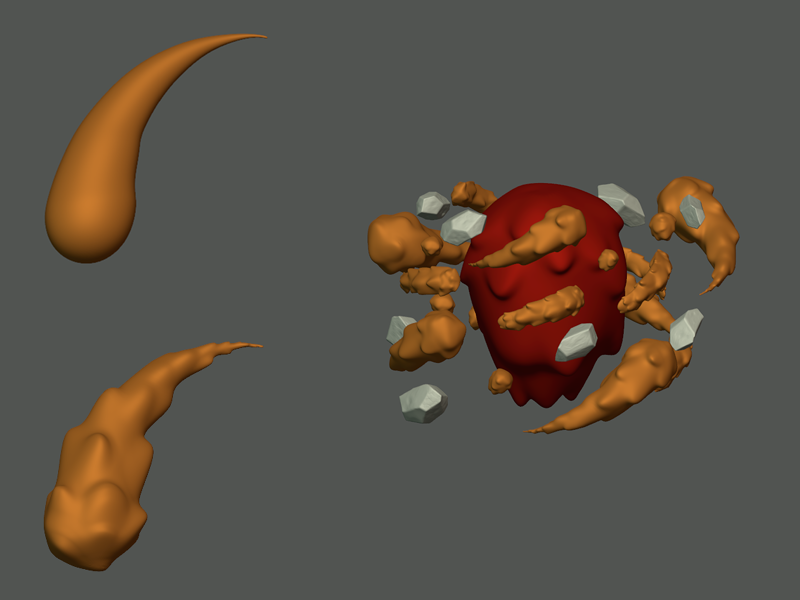
Just like the lava blob, I took some pre-made rocks and scattered them around the floating lava blob. I created some abstract lava drops using a similar method. I started with a UV sphere and dragged out the shape to make a curved looking water droplet. I used the same method of using the grab and snake hook tools to create a flowing lava look.
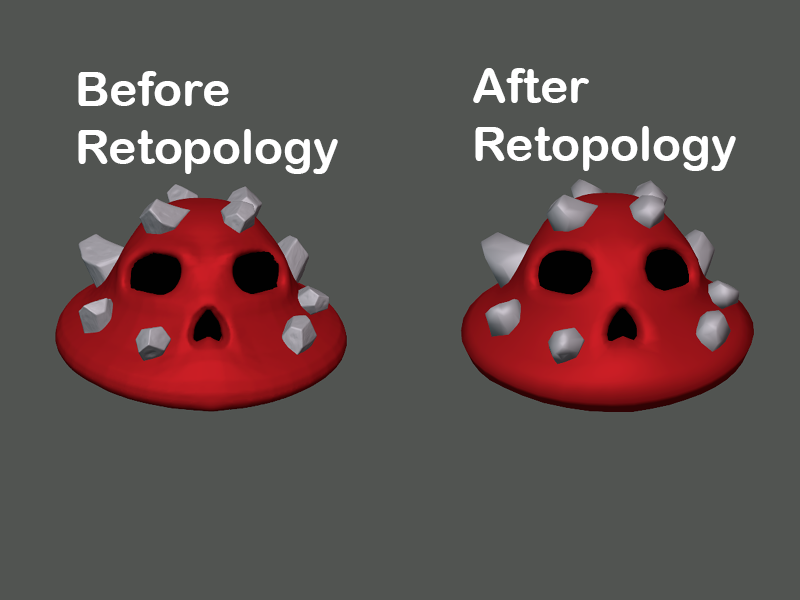
With all three models in place, I started working on the retopology. The rocks for each from were relatively easy to optimise and I used the decimate feature along with the shrink-wrap modifier, which created a low poly rock that was able to keep the shape of the original rock quite well. This was the same for the lava droplets that's surrounded the floating lava blob, due to its relatively simple shape, which allowed me to save a lot of time.
However, the three core models required a different method to optimise. I used a manual method of retopology, which used a few add-ons including the Bsurfaces and loop tools add-ons. This method allowed me to use the annotate tool to draw on a set of planes that I could then extrude from to cover the whole mesh. Snapping was enabled and a shrink wrap modifier was used so that the planes could cover the mesh in the most efficient way, without sacrificing too much detail.
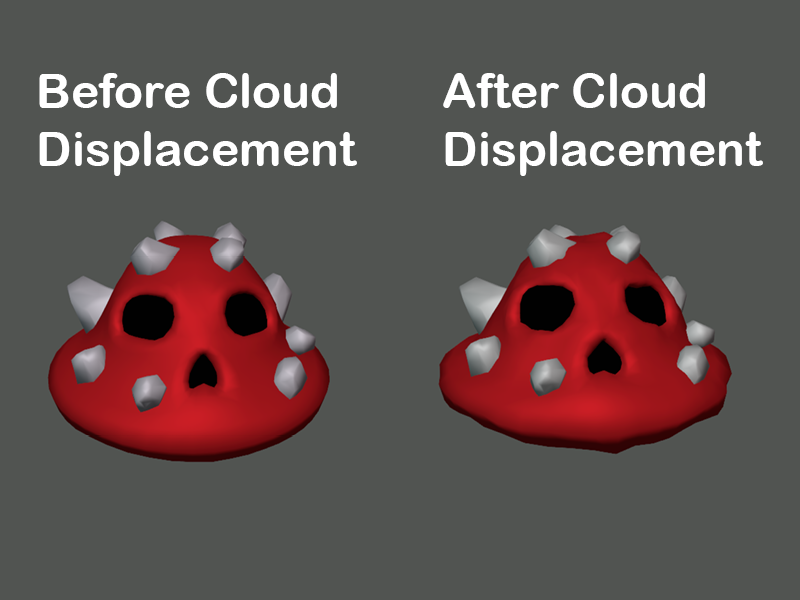
With all the forms having their low poly meshes completed, I could add one more feature before working on the texturing. The low poly meshes of the core parts of each form, looked to smooth to be considered lava. To fix this I used a cloud displacement texture on each of these models. This created a cloud looking effect on the core of each model, which took them from having smoother looking skin to more random and bumpy looking lava skin.
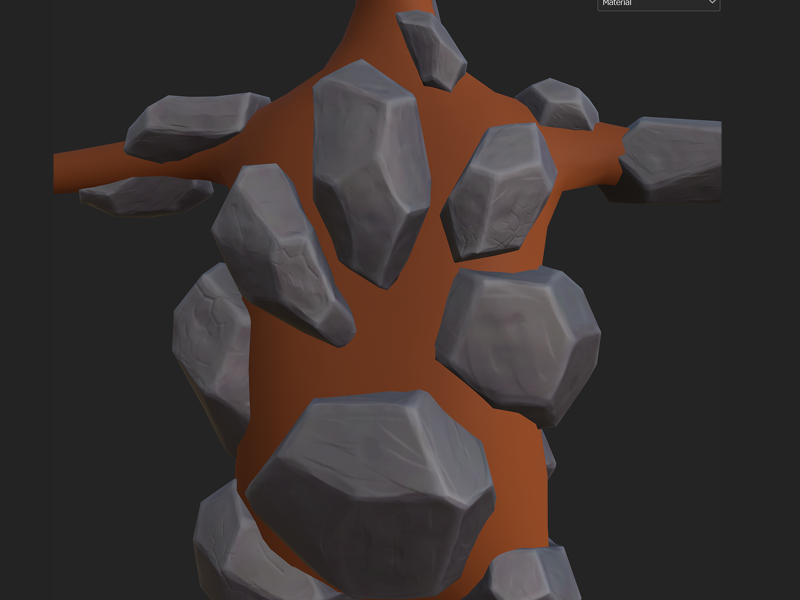
Finally, I worked on the UVs for each model and took the rocks into Substance Painter (Adobe Substance 3D, 2014) to bake the low poly models and create the rock textures.
I followed a similar style to the rock textures that were already in the game. This involved creating paint splotches that covered a base rock colour, which was created by adding a fill layer with matfinish-galvanised set as the base colour and an HSL filter on top of that.
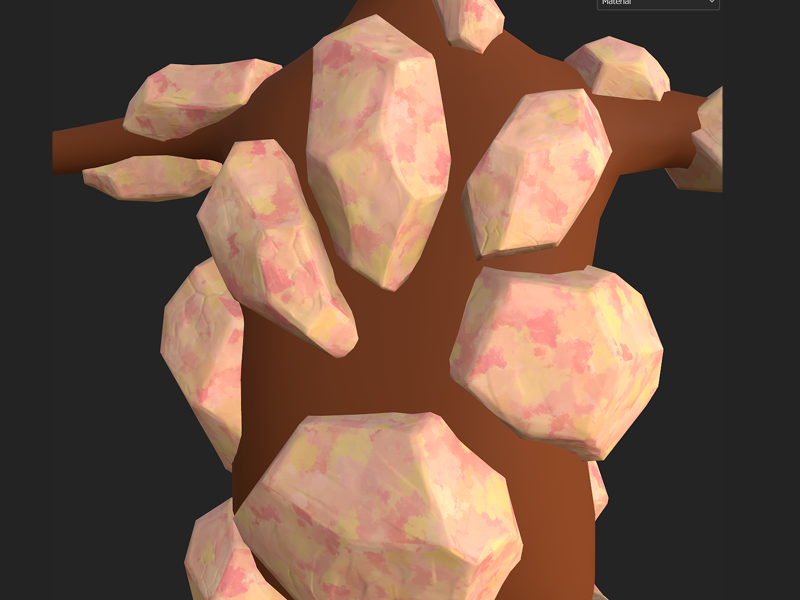
This created a paint splotch look, where I could alter the hue, saturation and strength of the paint splotches.
In addition, I also created an Ambient occlusion layer to create darker areas on the rock. This involved using a darker base colour and adding an ambient occlusion generator to a black mask. The same was done to create edge highlights for the rocks but Instead of a darker base colour, a lighter one was used. Lastly, I used a stylised baked lighting filter to get the finalised rock texture.
I took these textures back into Blender (Blender.org, 2002) so I could create some renders to show them off. However, before that I needed to create a lava skin texture to accompany the rocks.
I used Blender's shader node system to create this texture. To create the bumpy lava rock texture, I used a texture coordinate node plugged into a mapping node which then connected to a noise texture node. From here I went two ways, firstly I attached a bump node which also connected to the BSDF node to create the bumpy looking rock on the surface. I also connected a colour ramp to the noise texture node. This colour ramp, along with the BSDF node and an emission node, were all connected to a mix shader node, which then attached to the final material output node. This pathway is what created the procedural lava emission that covered the texture.
I was able to alter the sliders on the colour ramp node to change how much procedural lava was shown. I also changed some of the figures on the noise texture node to make the lava look more stylised. This included toning down the scale and roughness values and increasing the lacunarity value, which gave the lava a more random shape. Lastly, I increased the emission levels on the emission node and enabled bloom in the render settings.
Our end on year show was approaching so I wanted to get some renders of the three different models so I could show them off. I created a simple render scene using different wall and floor assets from the game, and used the Cycles render engine to get the final renders.

The three different models were almost complete, and there were only a few more features that needed to be implemented before they could be taken to the next stage of rigging and animation. This mainly included a tornado shader for the second form. This shader would be able to assist a simple spinning animation of the orbiting rocks and lava droplets, which would create a great looking tornado effect.
I took the model into Unity (Unity, 2005) and started creating the shader using the game engine's shader graph system.
I mostly followed a tutorial by (CGSheep, 2021) on how to make this as I was completely new to Unity's shader graph system, and I wanted to get a short clip of the tornado in its early stages of development to show off at the end of year show.
The images shown above show the unlit shader graph that makes a twirling effect. A mix of float and vector 2 properties are used alongside a variety of different nodes to create the twirling and dissolve effect. The shader involves creating a left and right twirling movement, which is then blended together and multiplied to create a more random looking twirling movement on the model. The speed and intensity of this twirling movement is controlled by using vector 2 and float nodes respectively.
The tornado shader is currently in early development, and so far, I have only created a shader that dissolves the model and creates a twirling effect.
There definitely are some improvements to be made here, for example, the mesh needs better UVs and the twirl effect can look laggy in the game view. The appearance of the shader shown here is subject to change, as I plan to explore different methods of creating tornado shaders using Unity's shader graph system.
In conclusion, this was a very beneficial project, as I was able to step outside my comfort zone in multiple areas, including creating shader graphs in Unity and textures in Blender as opposed to Substance Painter. It was also a great opportunity to develop some of my existing skills such as sculpting and rendering. I was also able to expand my knowledge with new techniques such as an efficient manual retopology method and using displacement textures in Blender.
The Mimic enemy is starting to come together and there are only a few more steps until the character can be rigged and animated. This includes finishing and refining the tornado shader and making sure the models and their lava textures are baked properly so they can be transferred into Unity.